MultiPOS Point of Sale for WooCommerce
Complete documentation for MultiPOS - Point of Sale for WooCommerce. Learn how to install, configure, and use all features of your POS system. Follow the guides below for step-by-step instructions.
Why choose our plugin?
Our products stick to WordPress's quality requirements in security, quality, performance, and contemporary coding standards. Envato has given us a WP Requirements Compliant Badge for our plugins.
Installation
To access the admin panel in WordPress, navigate to the menu section and hover your cursor over the Plugins menu to see a submenu. From there, click on the Add New submenu.

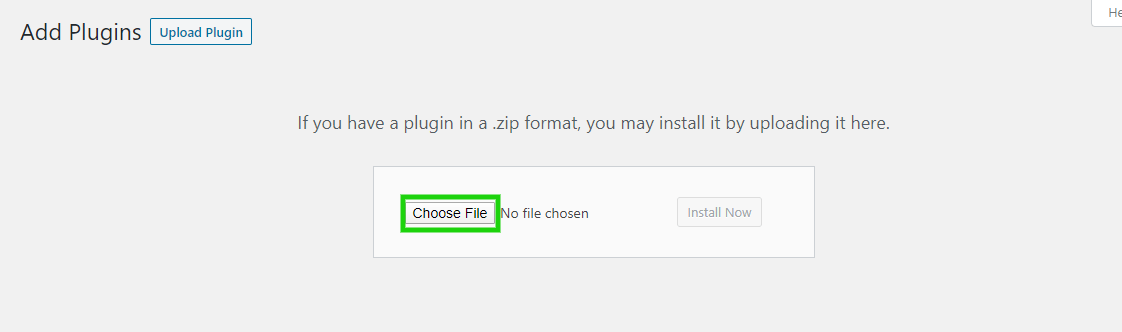
Next, click the Upload Plugin button to upload the plugin zip file.

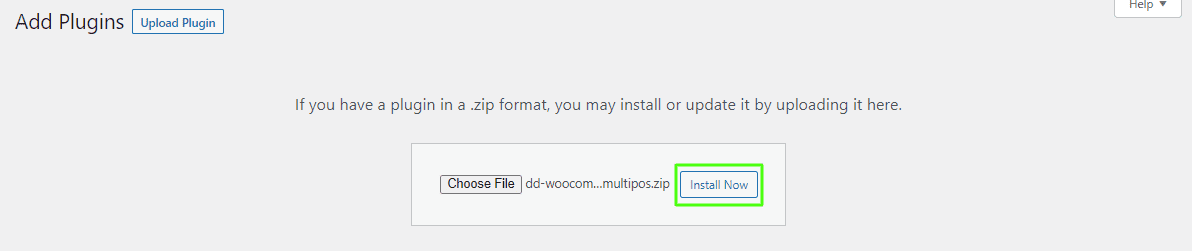
Use the Choose File option to locate the MultiPOS – Point of Sale for WooCommerce plugin. Click the Install Now button to complete the plugin installation process.
Once the plugin file is selected, click Install Now to begin installation.
After installation completes, click Activate Plugin to enable MultiPOS.

Admin End
Click on Configuration to access the plugin's configuration page, or hover over the MultiPOS – Point of Sale admin menu to view various submenus. The configuration page has 6 tabs for altering various settings.


General Configuration
The General Configuration tab contains core settings for your POS system:
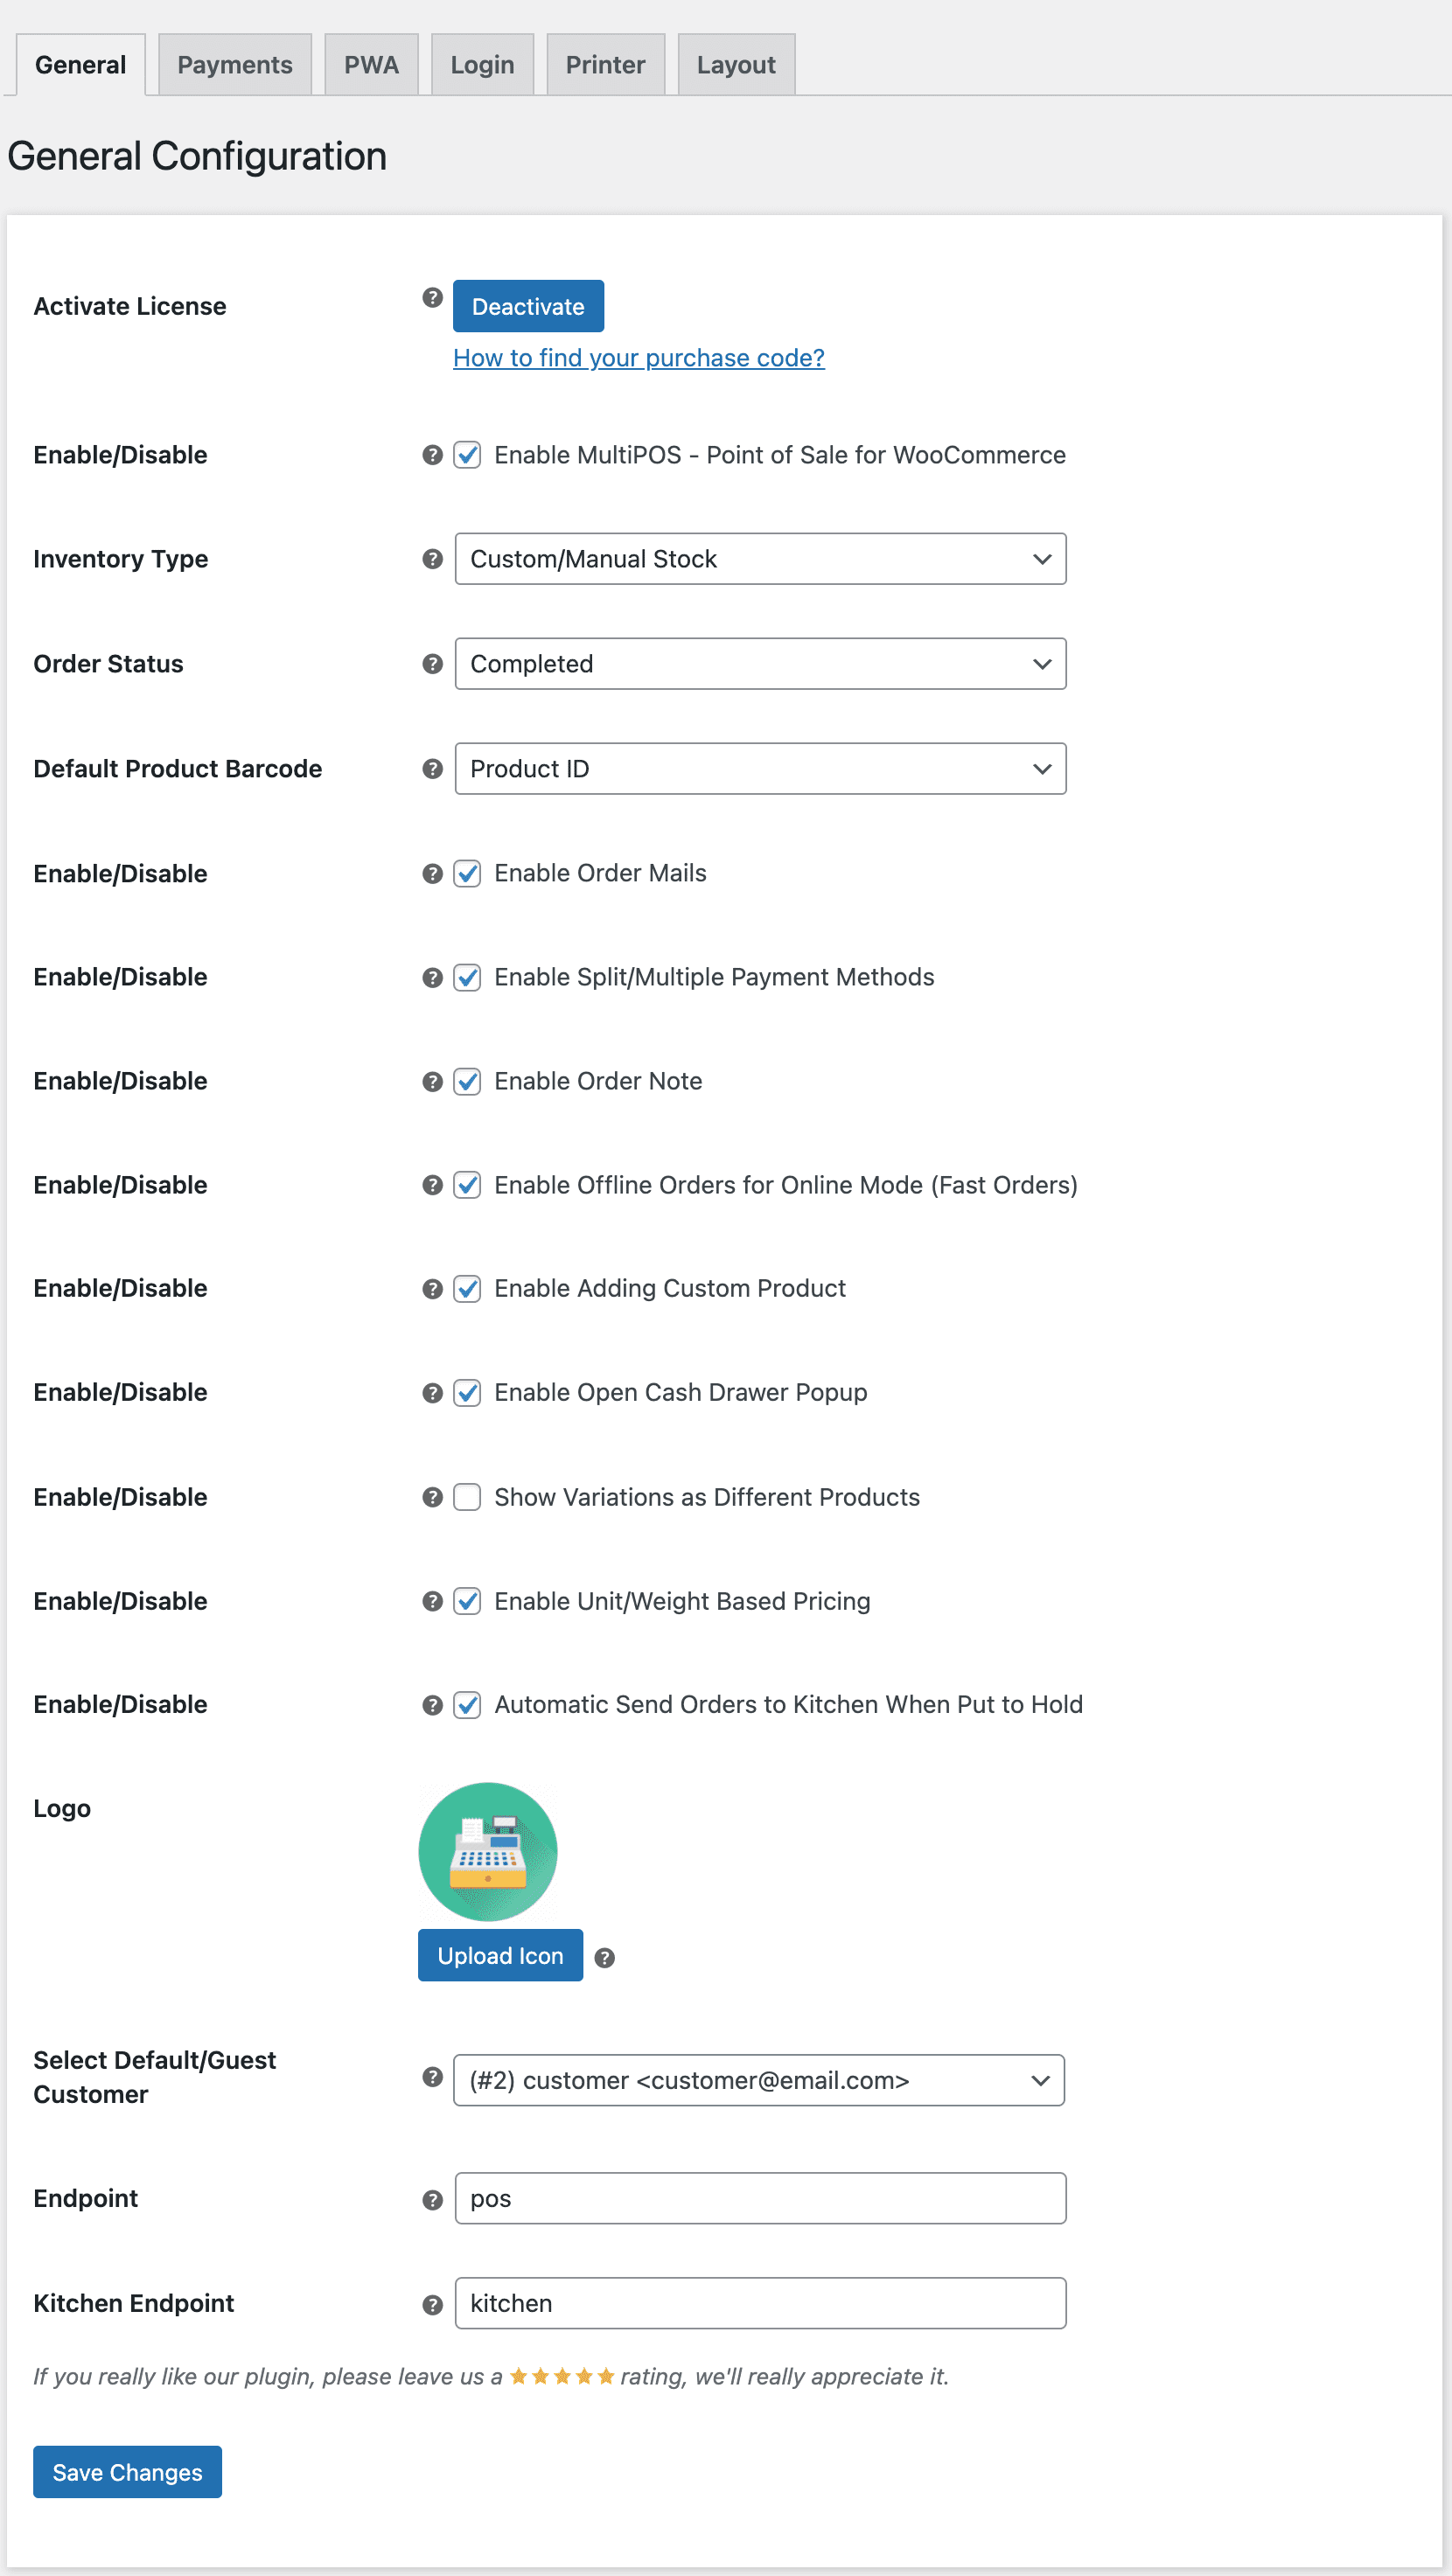
Inventory Type: Choose Custom for outlet-specific stock or Centralized/WooCommerce for shared inventory between POS and online store.
Order Status: Select the default status for POS orders (e.g., processing, completed).
Default Product Barcode: Use Product ID or SKU for automatic barcode generation.
Enable Order Mails: Send email notifications when POS orders are placed.
Enable Split/Multiple Payment Methods: Allow customers to pay using multiple methods (cash + card, etc.).
Enable Order Note: Allow cashiers to add notes to orders.
Enable Offline Orders for Online Mode (Fast Orders): Create orders offline and auto-sync when online. Only works with Custom inventory mode.
Enable Adding Custom Product: Let cashiers add products not in the catalog (services, one-offs).
Enable Open Cash Drawer Popup: Prompt cashier to enter opening cash amount daily.
Show Variations as Different Products: Display product variations as separate items in POS.
Enable Unit/Weight Based Pricing: Price items by weight (groceries, produce).
Automatic Send Orders to Kitchen When Put to Hold: Auto-send held orders to kitchen display (restaurant mode).
Logo: Upload your brand logo to display on POS screens and receipts.
Select Default/Guest Customer: Choose which customer account is used for walk-in/guest orders.
Endpoint: URL where the POS terminal is accessed (e.g., /pos).
Kitchen Endpoint: URL for kitchen display system (restaurant outlets only).
Payments Configuration
Configure manual payment methods that appear at checkout. Cash is always present and cannot be removed.
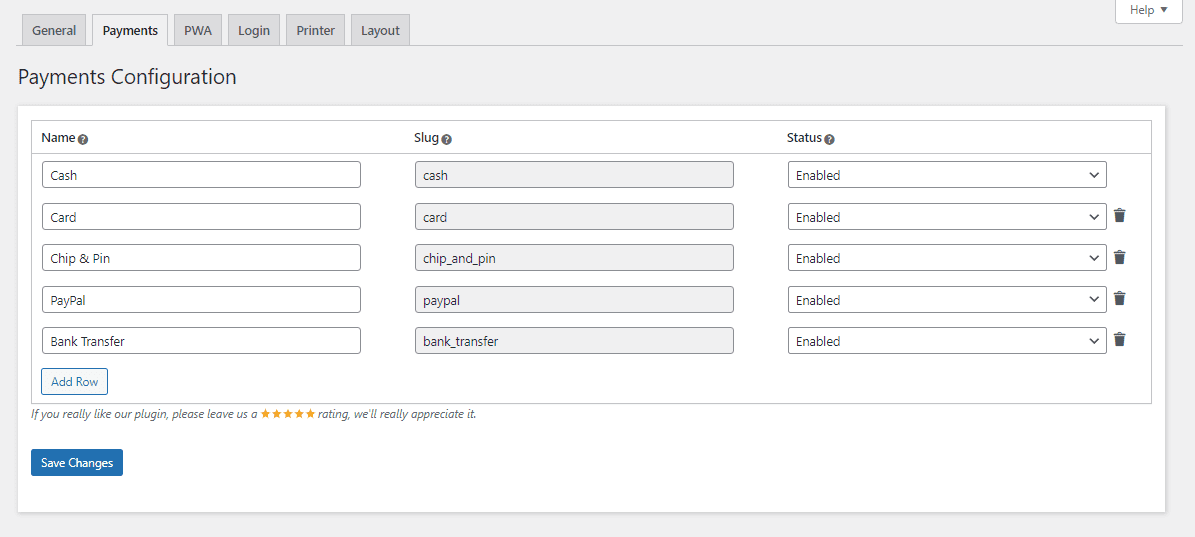
Add payment methods (e.g., "Credit Card", "Gift Card") that cashiers can use. Payment slugs are fixed for integration purposes.
PWA Configuration
Configure Progressive Web App settings so users can install MultiPOS as a native app on their devices.
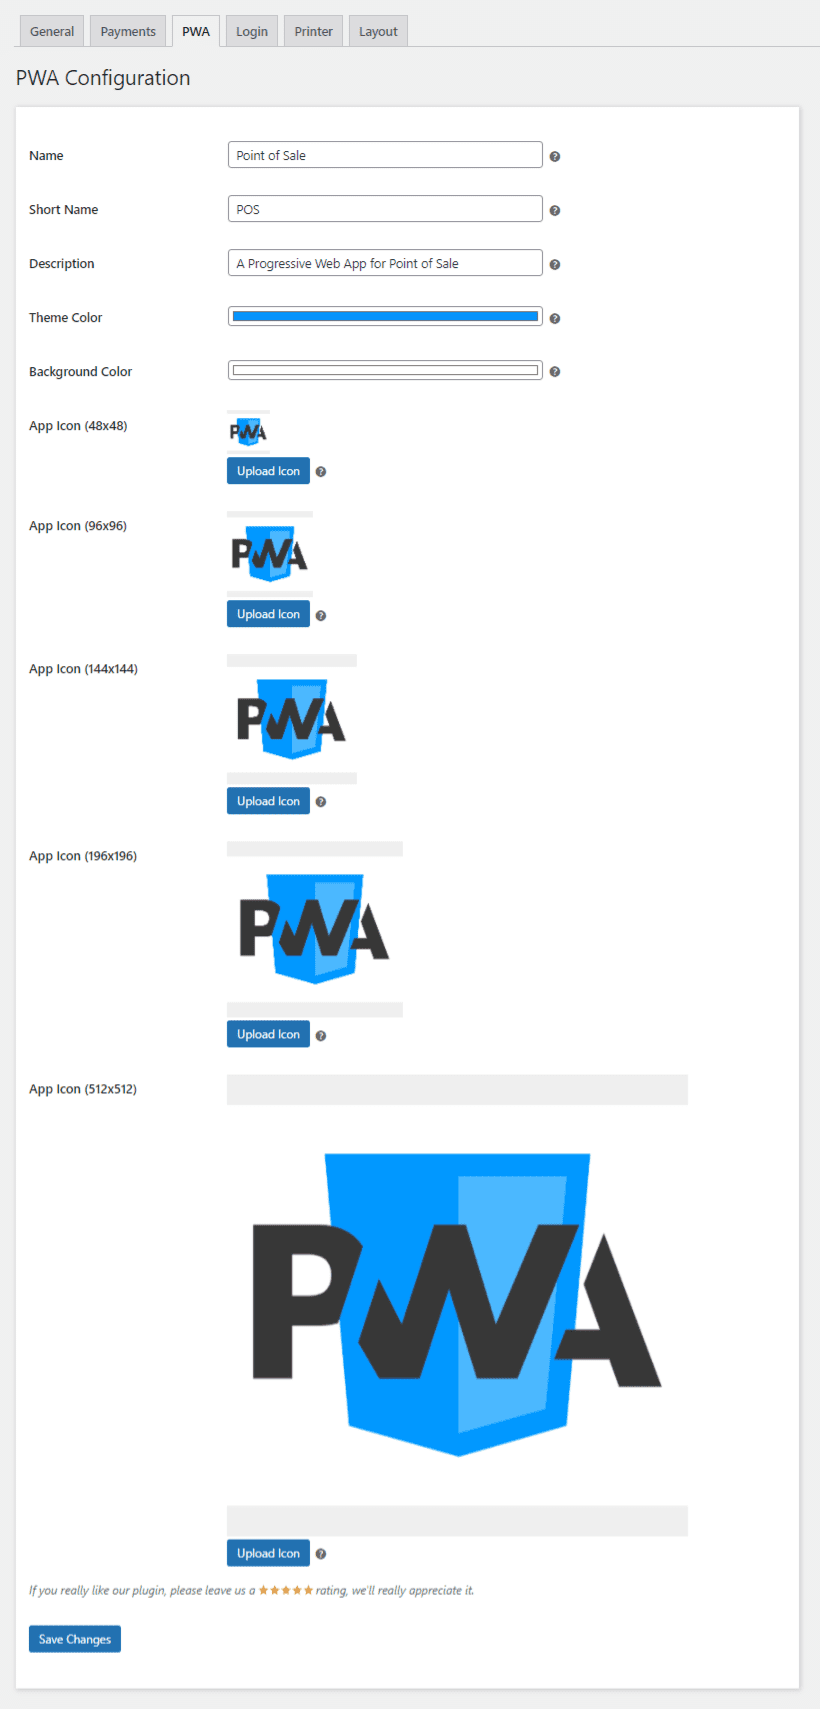
- Name: Full app name shown on home screen/desktop.
- Short Name: Abbreviated name for limited space (e.g., under icon).
- Theme Color: Color of splash screen and status bar.
- Background Color: Loading screen background color.
- App Icons: Upload icons for various device resolutions (512x512 recommended).
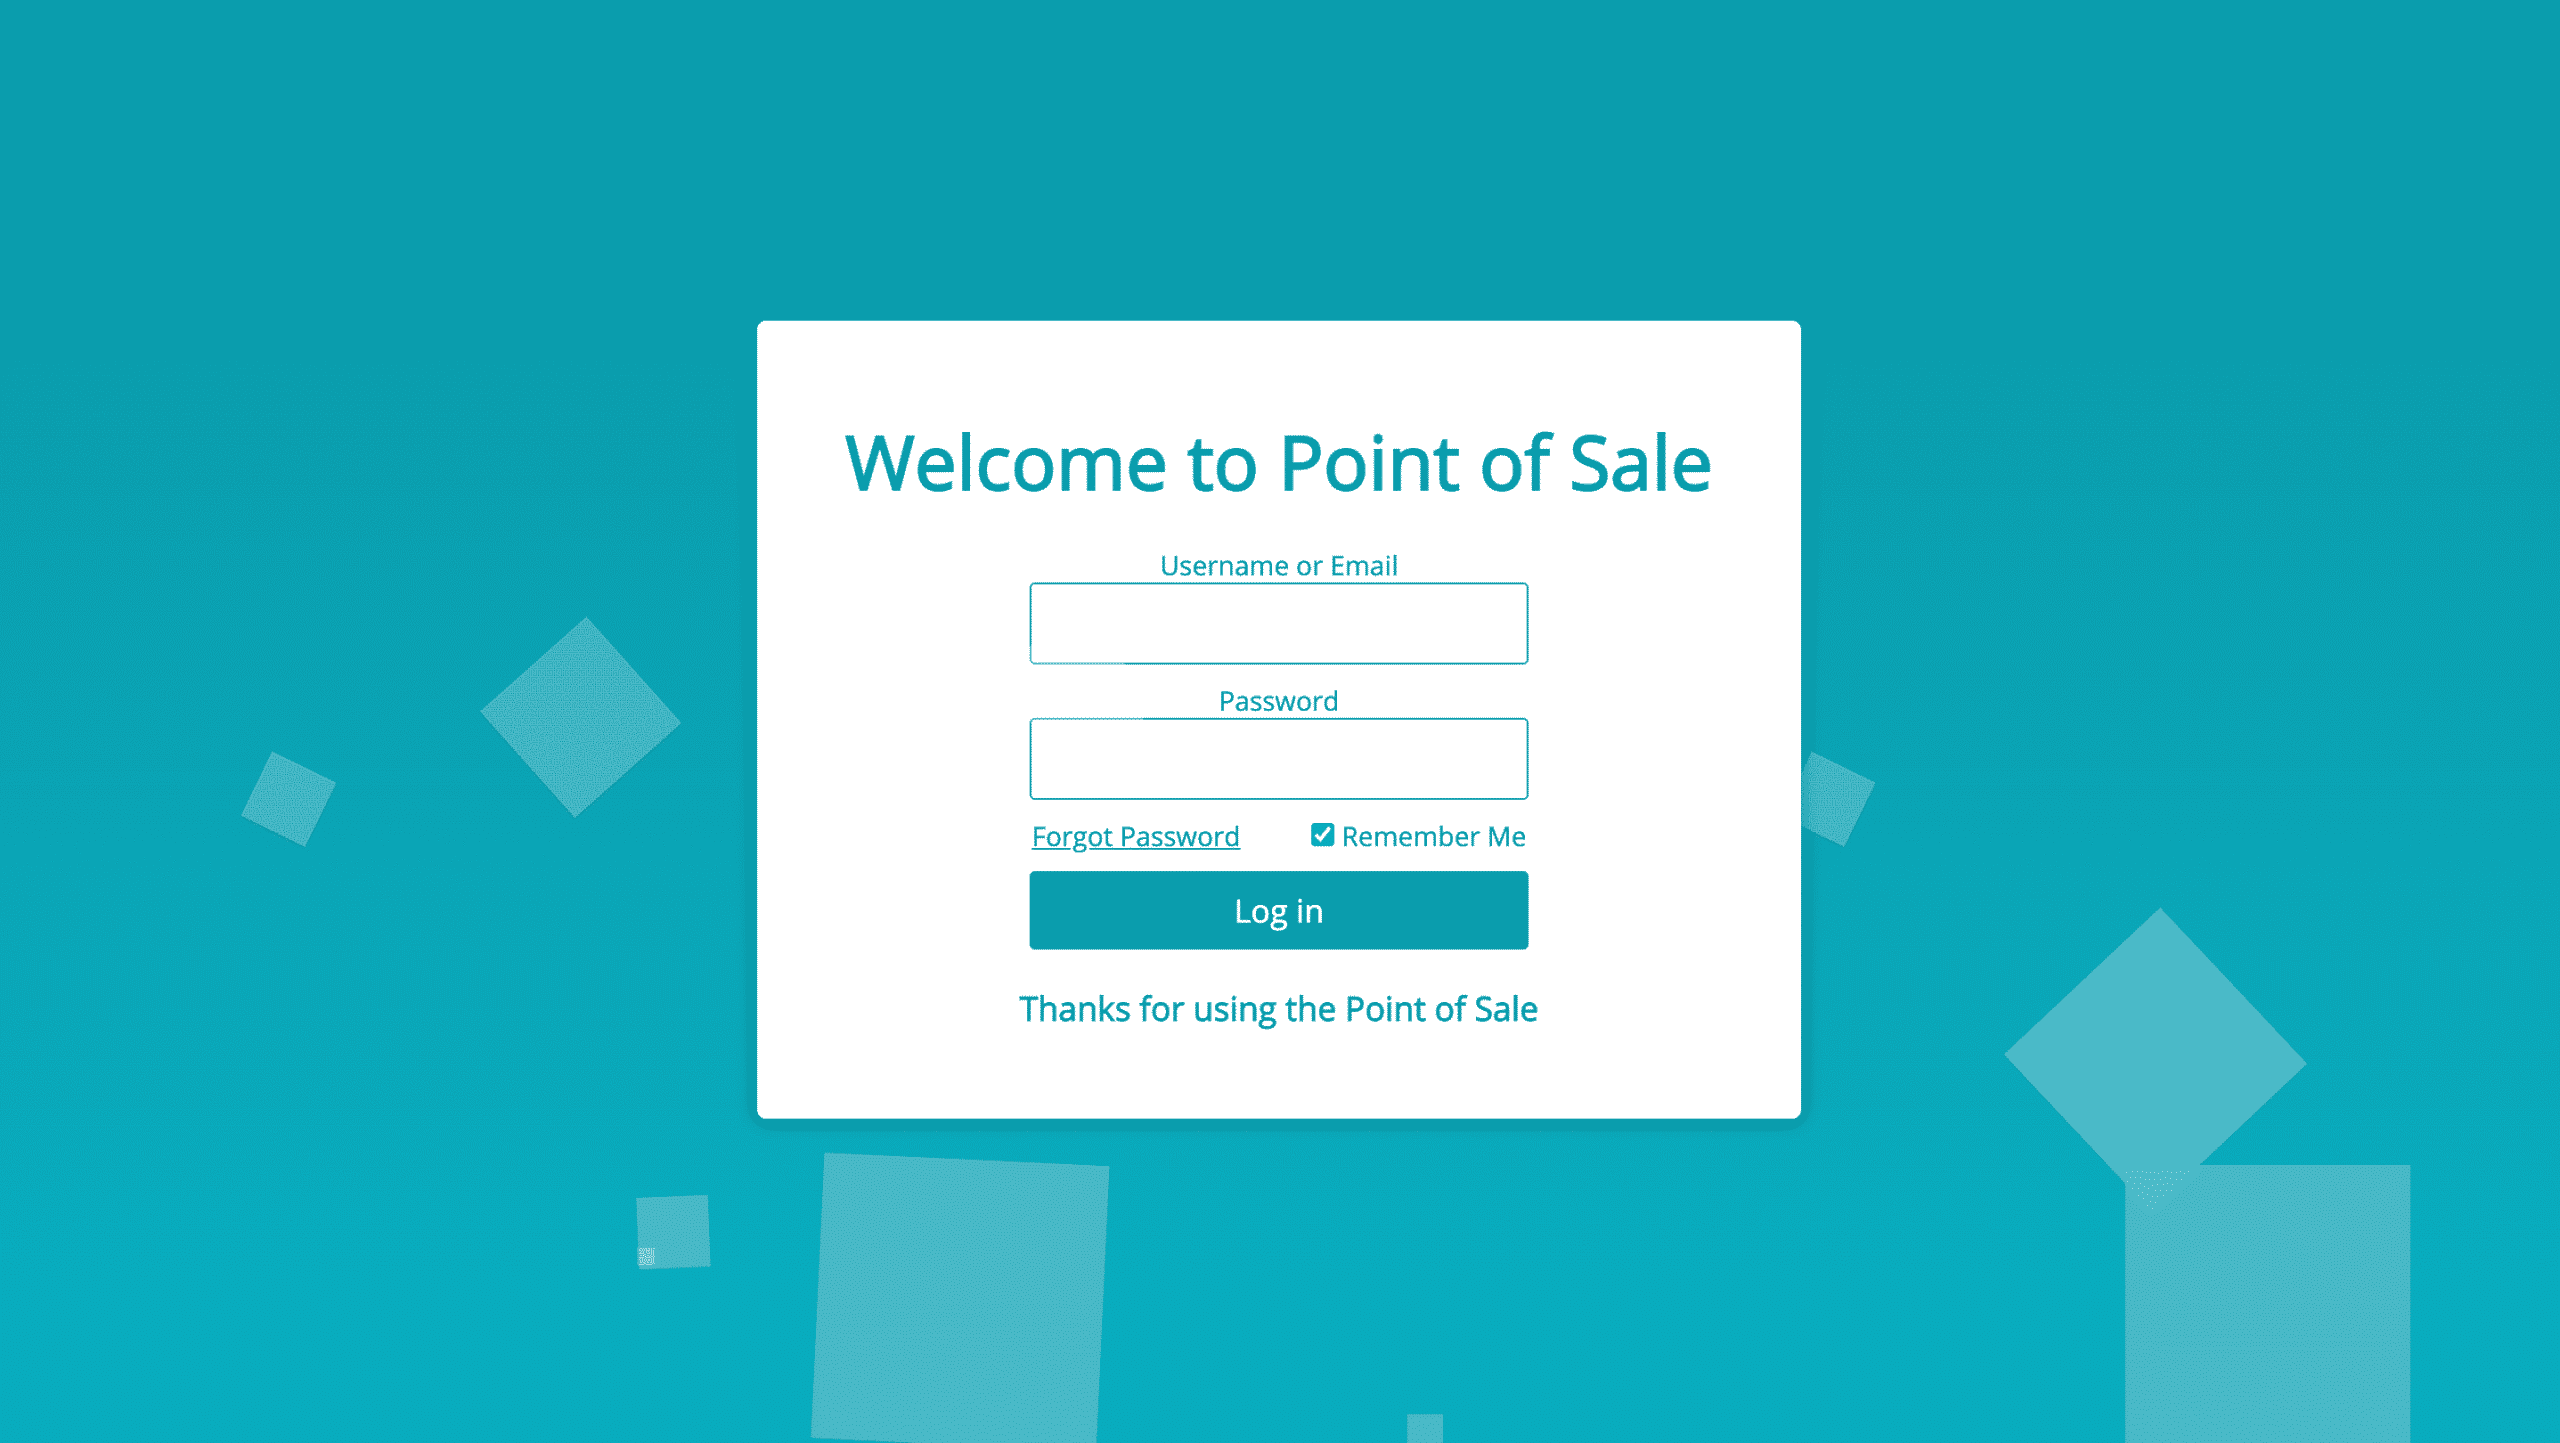
Login Configuration
Customize the appearance and behavior of the POS login screen.
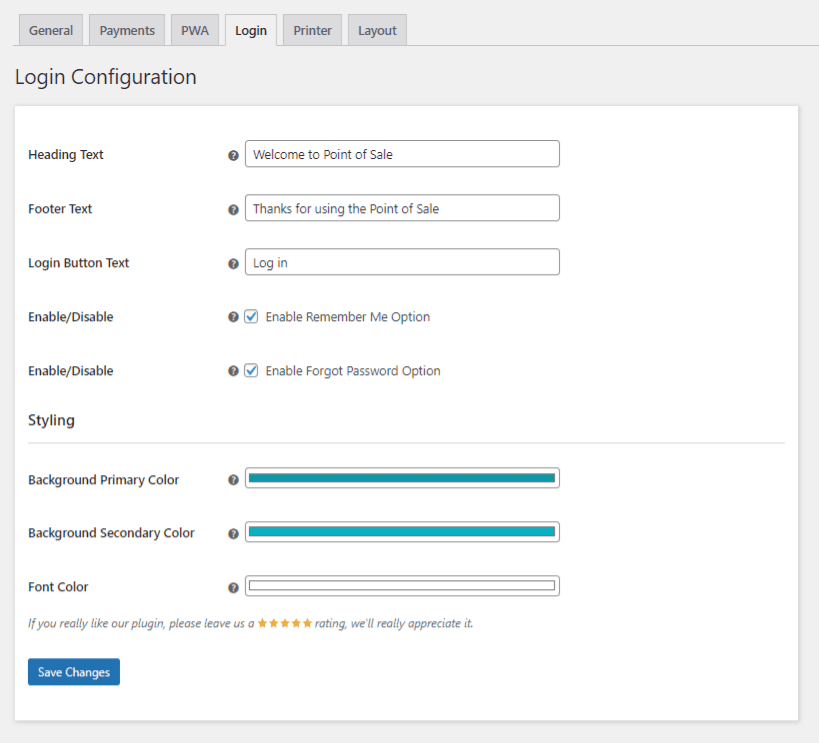
- Heading Text: Header text displayed above login form.
- Footer Text: Footer text below the login form.
- Login Button Text: Customize the submit button label.
- Enable the Remember Me Option: Show/hide "Remember me" checkbox.
- Enable the Forgot Password Option: Show/hide password reset link.
- Background Primary/Secondary Color: Gradient colors for login screen background.
- Font Color: Text color for the login form.
Printer Configuration
Configure settings for printing barcode labels and receipts/invoices.
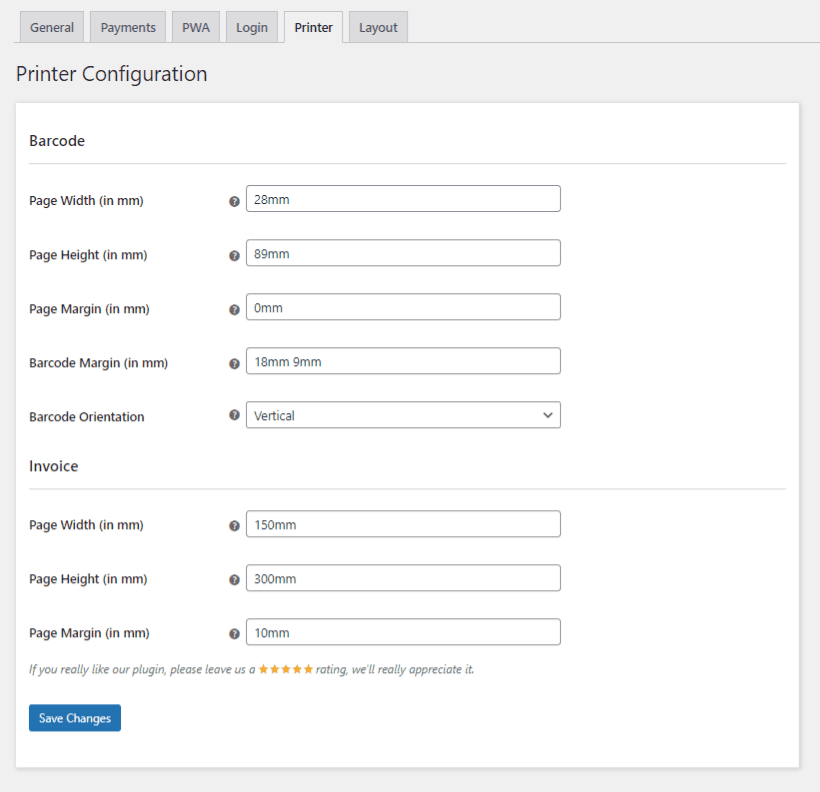
Barcode Settings
- Barcode Page Width/Height (mm): Paper size for barcode labels.
- Barcode Page Margin (mm): Margin around the printable area.
- Barcode Margin (mm): Space between individual barcodes when printing multiple.
- Barcode Orientation: Horizontal or vertical layout.
Invoice Settings
- Invoice Page Width/Height (mm): Receipt paper size (58mm, 80mm, letter).
- Invoice Page Margin (mm): Margin around receipt content.
Layout Configuration
Customize the visual appearance of the POS interface.
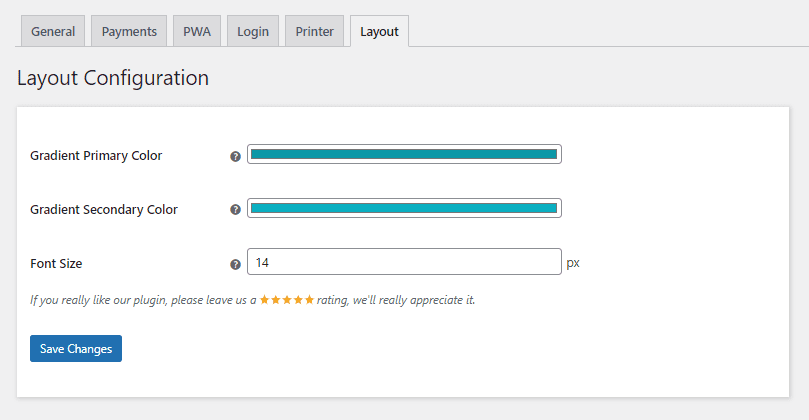
- Gradient Primary Color: Main color for POS UI gradients.
- Gradient Secondary Color: Secondary gradient color.
- Font Size: Adjust text size for better readability on different screens.
Analytics
Access comprehensive sales reports and analytics for your POS operations.
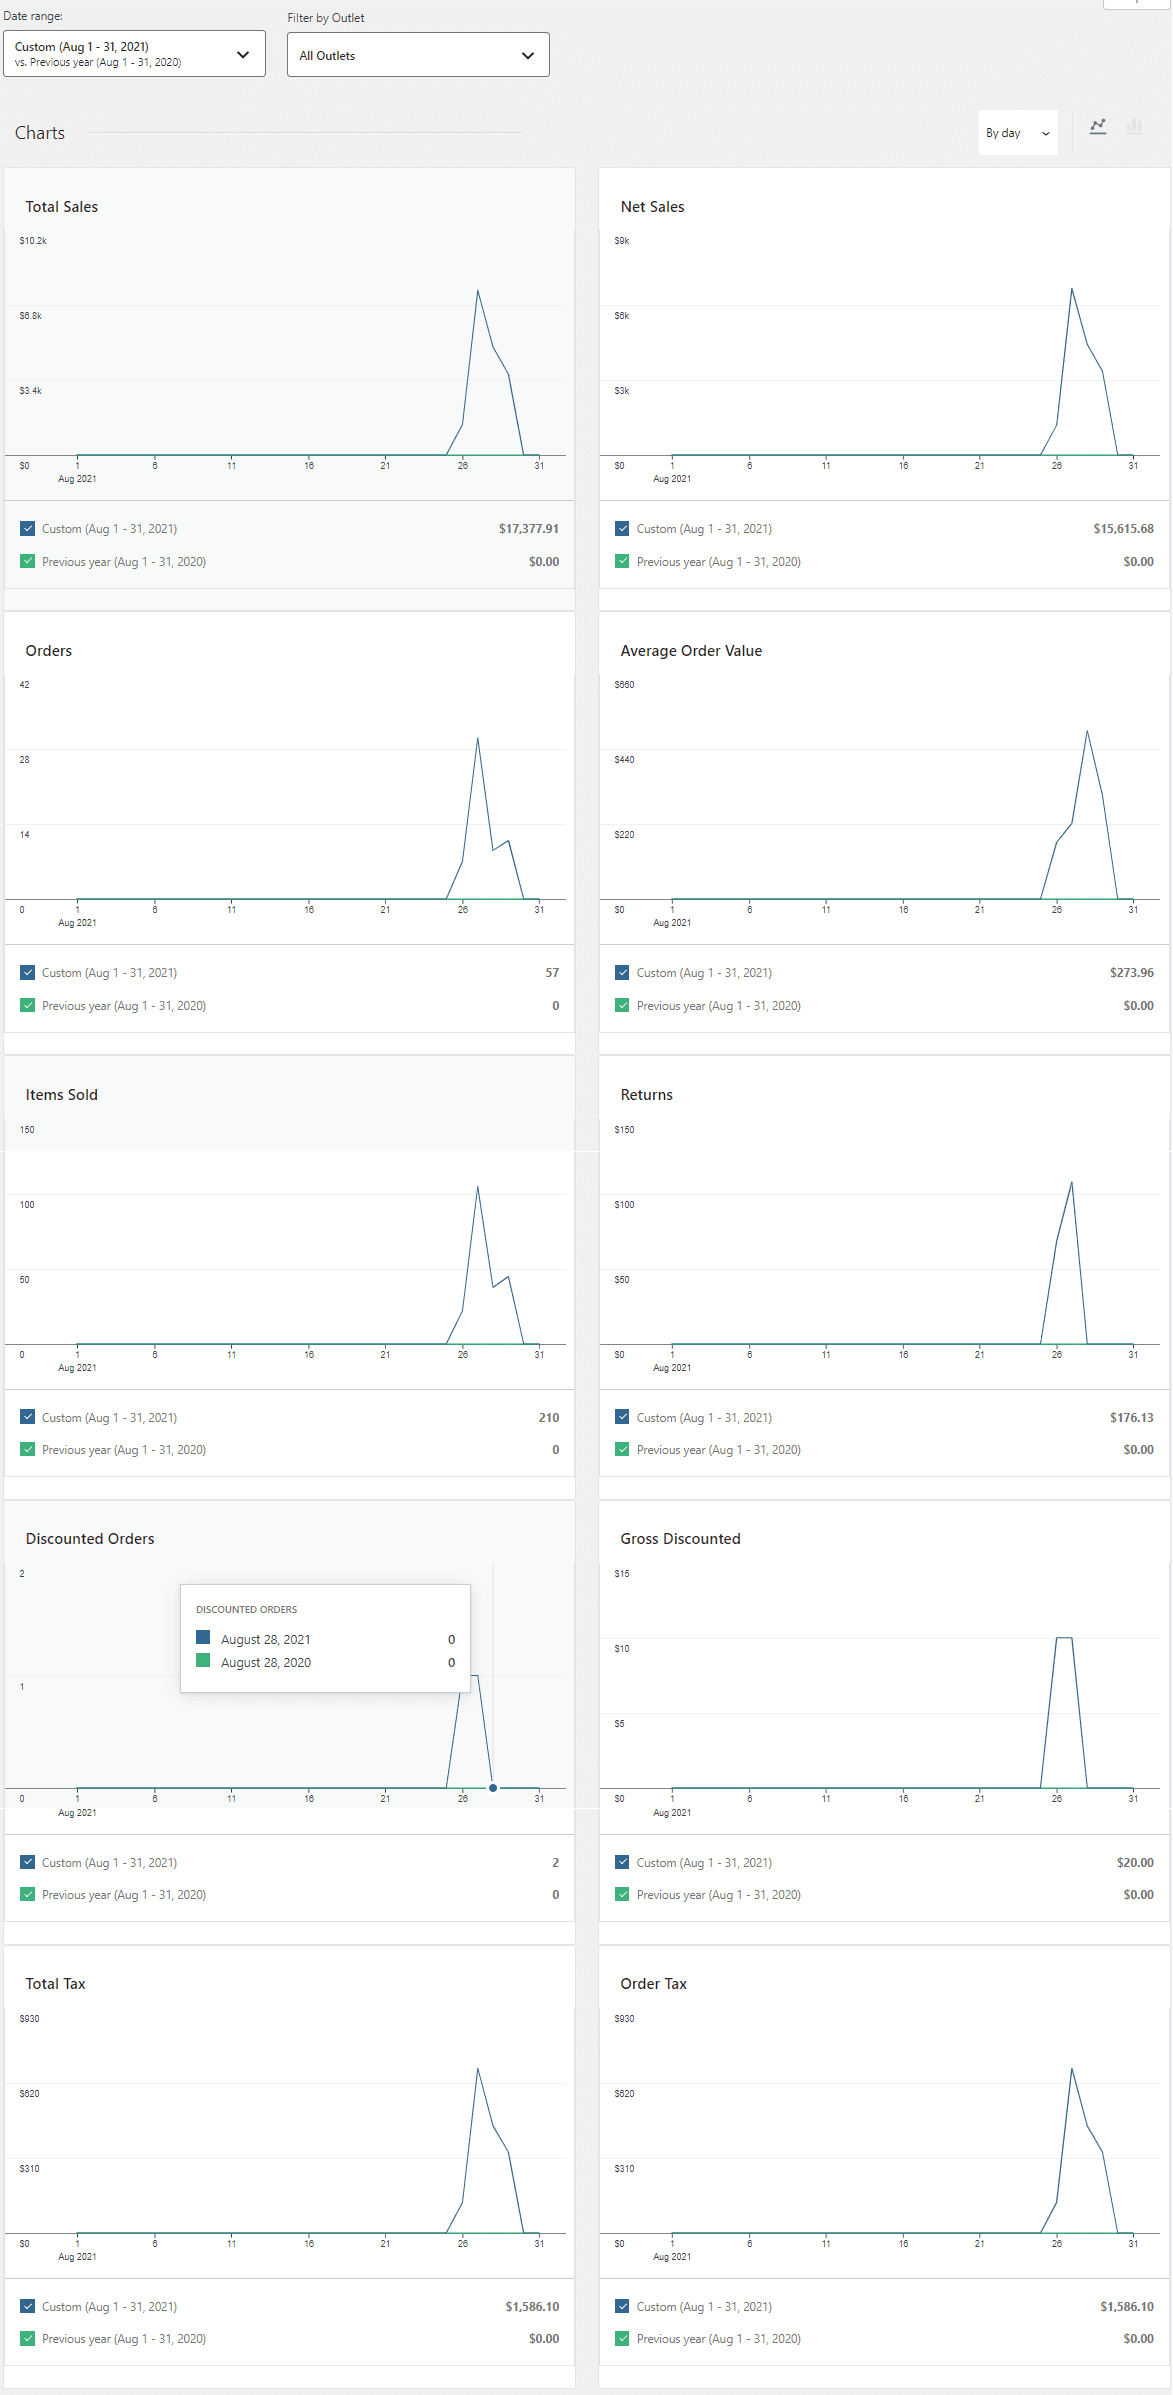
The Analytics section displays key metrics including:
- Total Sales: Gross revenue from all orders.
- Net Sales: Revenue after returns and discounts.
- Orders: Total number of transactions.
- Average Order Value: Average spend per customer.
- Items Sold: Total quantity of products sold.
- Returns: Number and value of returned items.
- Discounted Orders: Orders with discounts applied.
- Total Tax / Order Tax: Tax collected.
Filter reports by date range, outlet, cashier, and payment method to gain insights into your business performance.
Outlets
Create and manage physical store locations under MultiPOS → Outlets.

Each outlet can be configured as:
- Grocery/Retail: Standard retail operations with cart checkout.
- Restaurant/Cafe: Enables table management and kitchen order system.
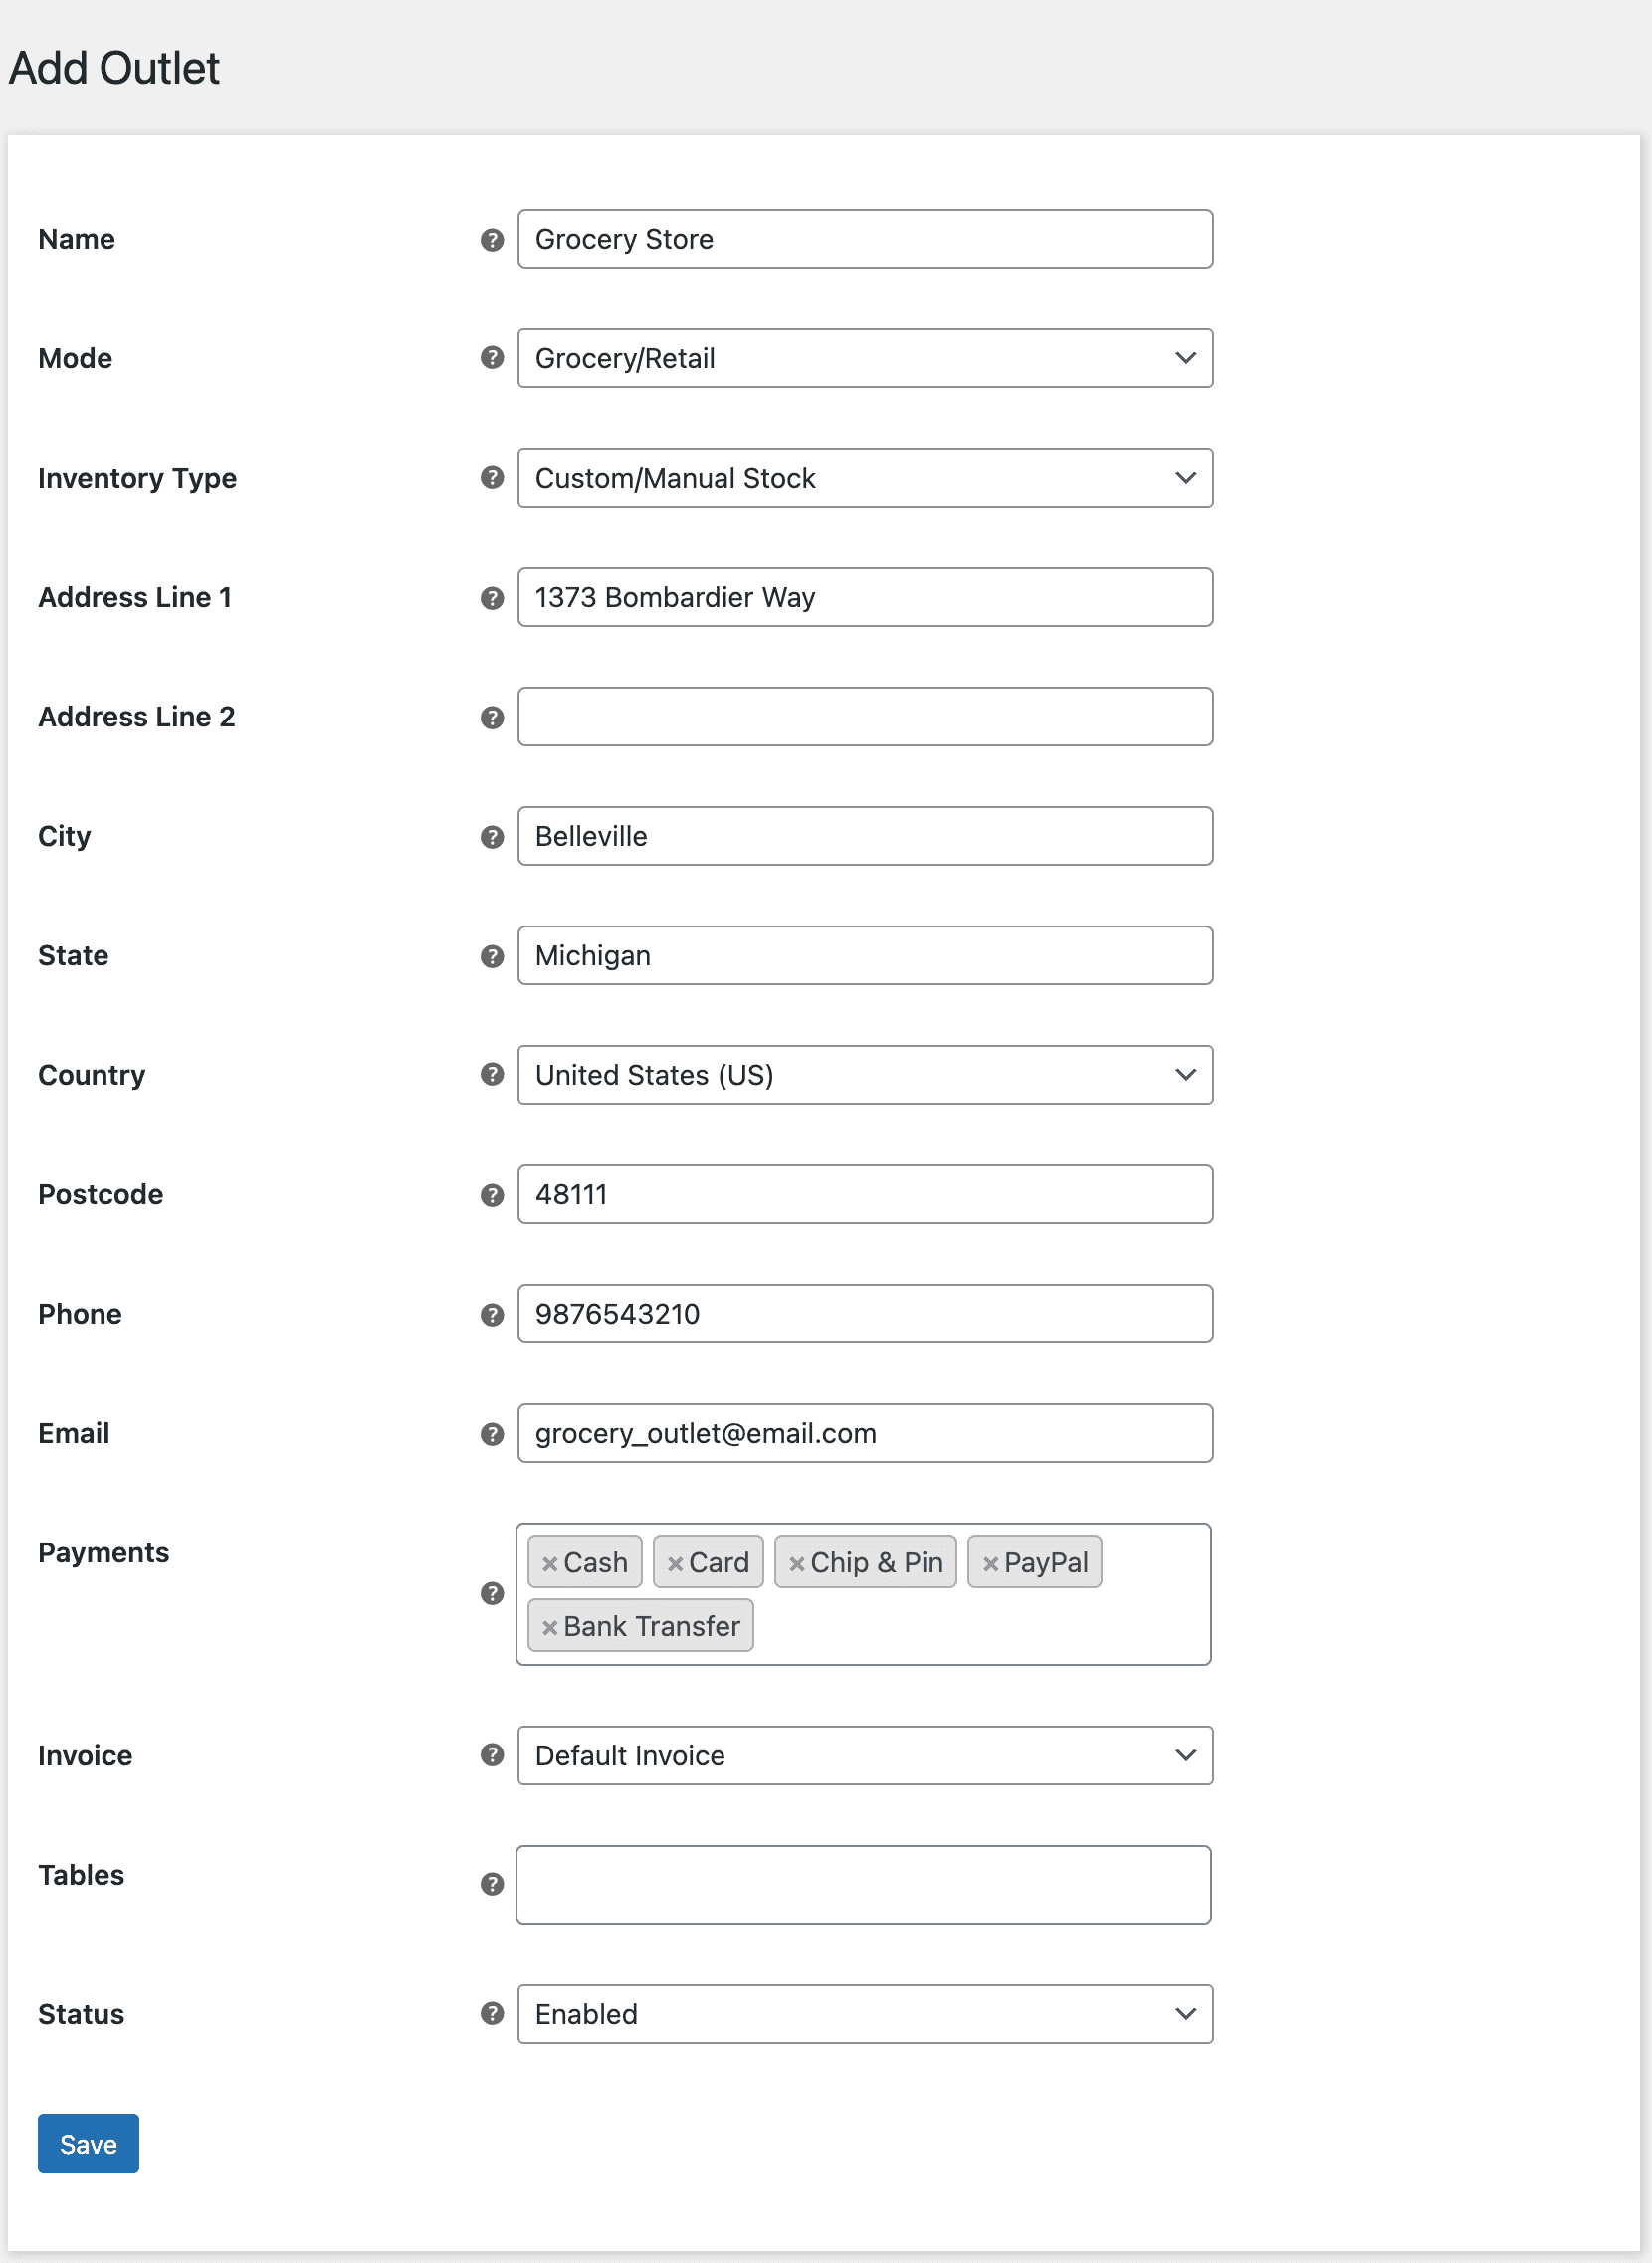
Add Outlet
Click Add Outlet to create a new location. Configure:
- Outlet name and description
- Type (Grocery/Retail or Restaurant/Cafe)
- Assign tables (restaurant mode only)
- Select available payment methods
- Assign cashiers to this outlet
- Choose inventory mode (Custom or Centralized)
Cashiers
Create staff accounts under MultiPOS → Cashiers. Each cashier gets login credentials and can be assigned to specific outlets.
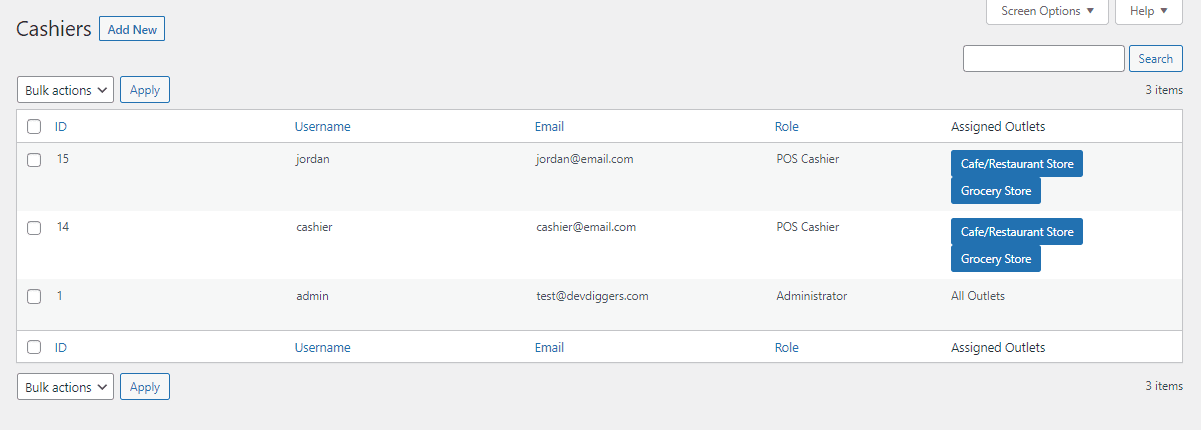
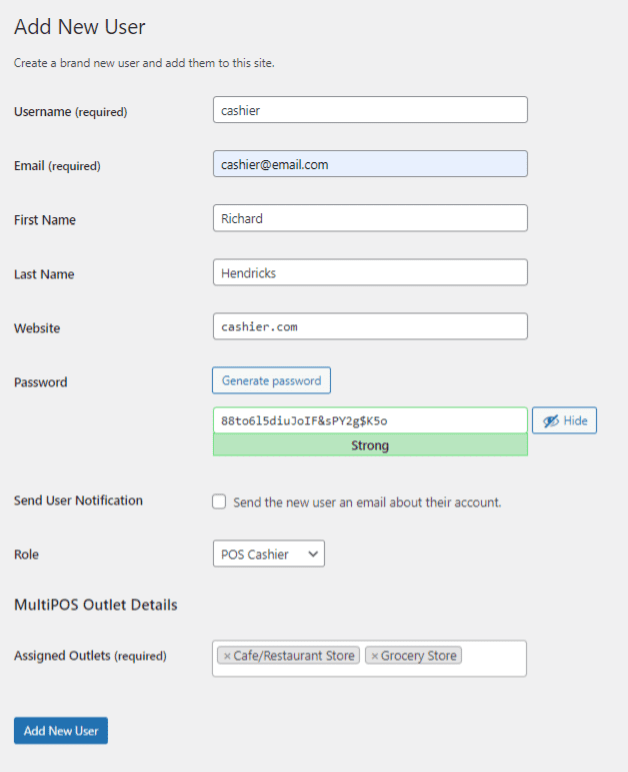
When adding a cashier, you'll set their WordPress user account, assign outlets they can access, and configure permissions. Cashiers only see their assigned outlets when logging into the POS.
Tables
Available only for Restaurant/Cafe outlets. Define table numbers and layout for order management.
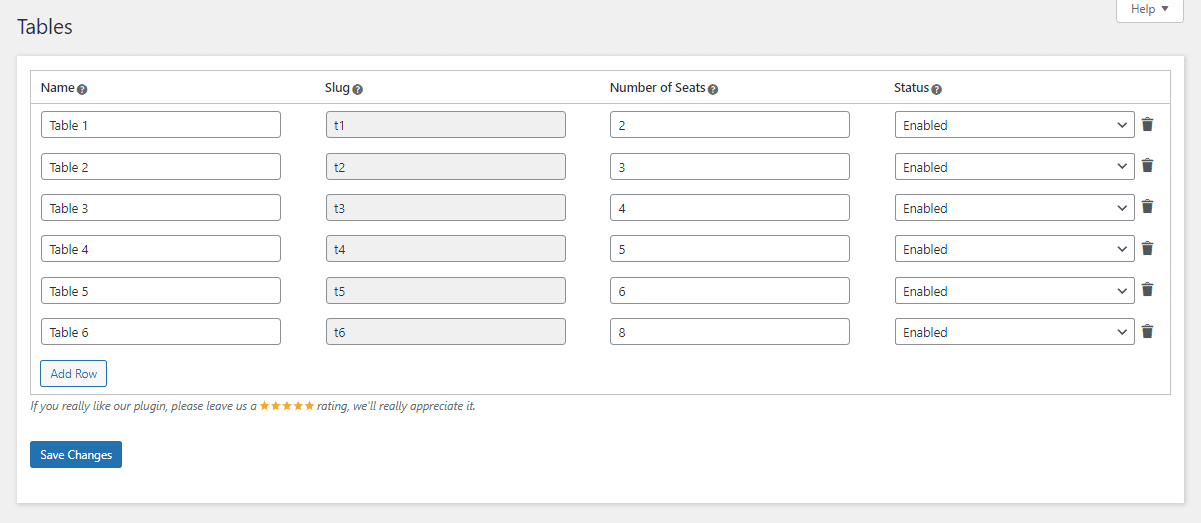
Create tables (e.g., "Table 1", "Table 2", "Table 3") that will appear in the POS for assigning customer orders.
Assign Barcodes
Generate barcodes for products and print barcode labels in bulk. Access via MultiPOS → Assign Barcodes.
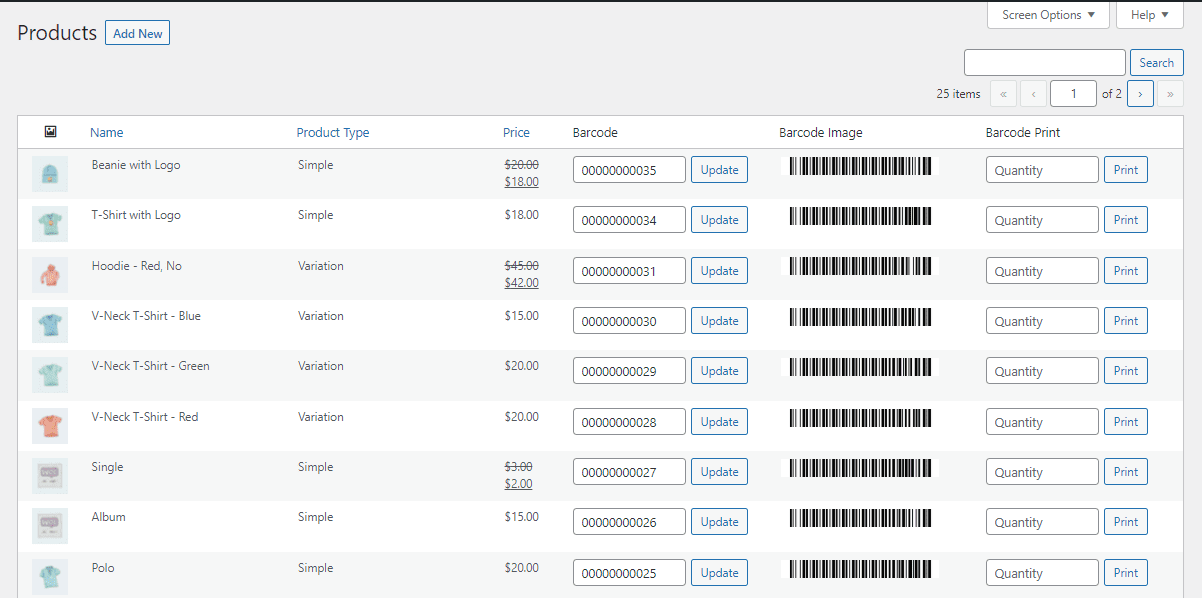
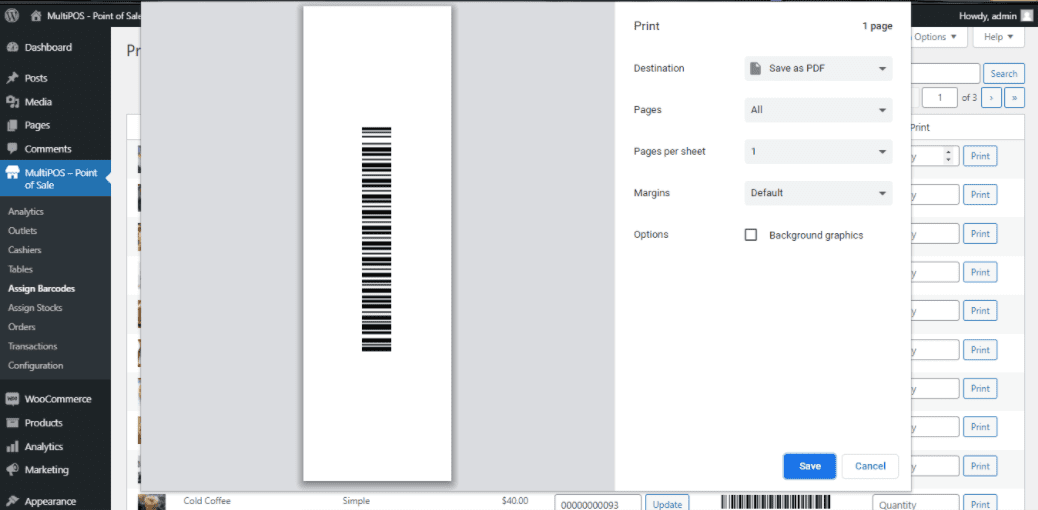
Select products, choose barcode type (Product ID or SKU based on your settings), configure page size and margins, then print barcode labels for your products. Works with standard barcode printers.
Assign Stocks
Allocate product quantities to specific outlets. This is used when using Custom inventory mode to maintain separate stock levels for each physical location.
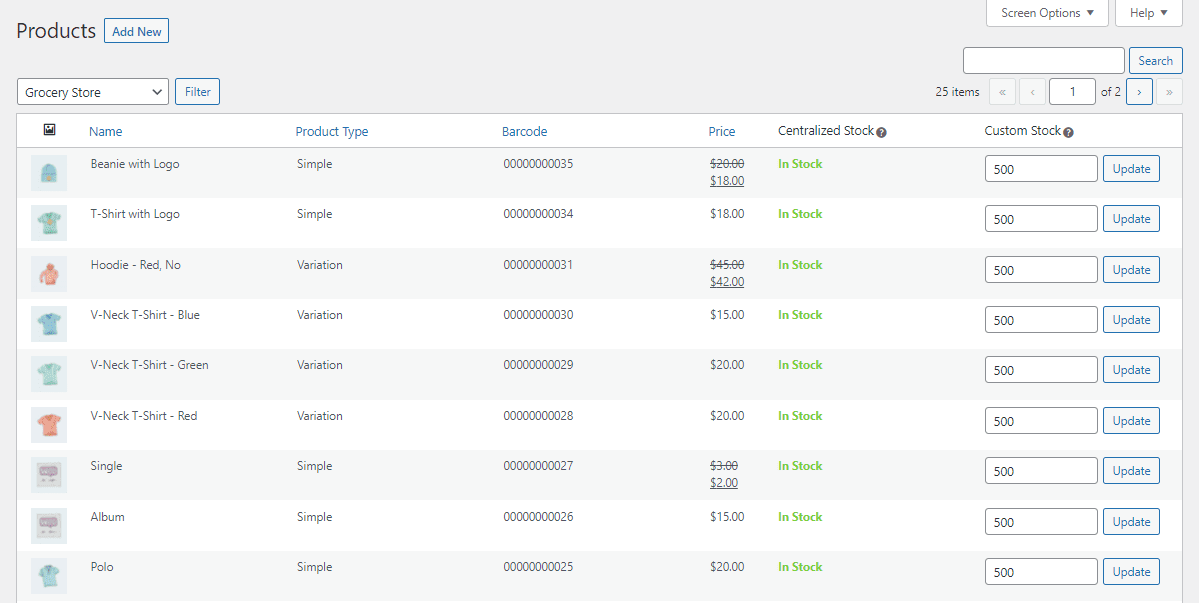
Select an outlet, then assign stock quantities to products. This ensures each location has its own inventory count that is independent of other outlets and the online store.
Orders
View and manage all POS orders under MultiPOS → Orders.
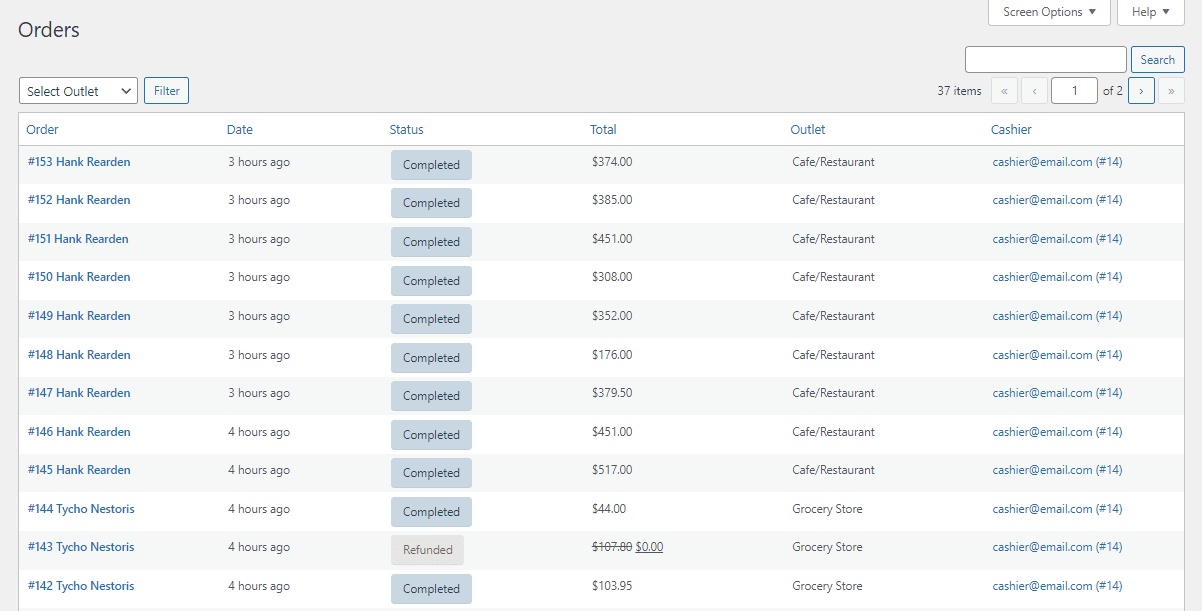
From here you can:
- View all online and offline orders
- Filter by date, outlet, cashier, order status
- Re-print invoices/receipts
- Process refunds and returns
- Release held orders back to cart
- Send orders to kitchen (restaurant mode outlets)
Transactions
Access daily cash reports under the Analytics/Statistics section. View opening cash amount, cash sales, total sales, expected vs actual cash drawer balance. Create manual transactions for petty cash in/out and track cash flow.
Invoices
Sales receipts/invoices are generated automatically after each order. You can reprint invoices from the Orders menu or from within individual order details. Receipt layout is customizable in Printer Configuration.
POS End
The POS (Point of Sale) terminal is where cashiers process sales. Access it via the configured endpoint URL.
Login Screen
When accessing the POS endpoint, cashiers see a login screen where they authenticate with their WordPress username and password.
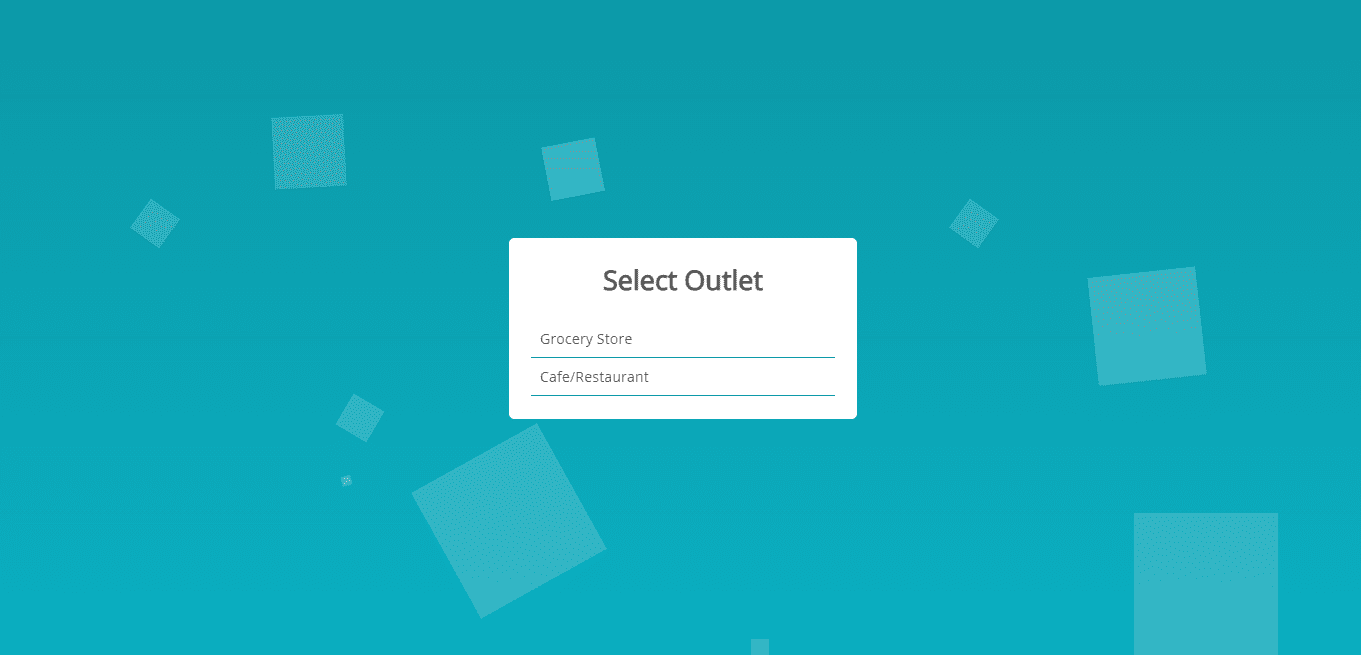
Select Outlet Screen
After successful login, the cashier selects which outlet they will be working at. Only outlets assigned to that cashier are shown. Once selected, all outlet-specific data loads.
Progressive Web App
MultiPOS can be installed as a PWA on desktop and mobile devices for a native app experience.
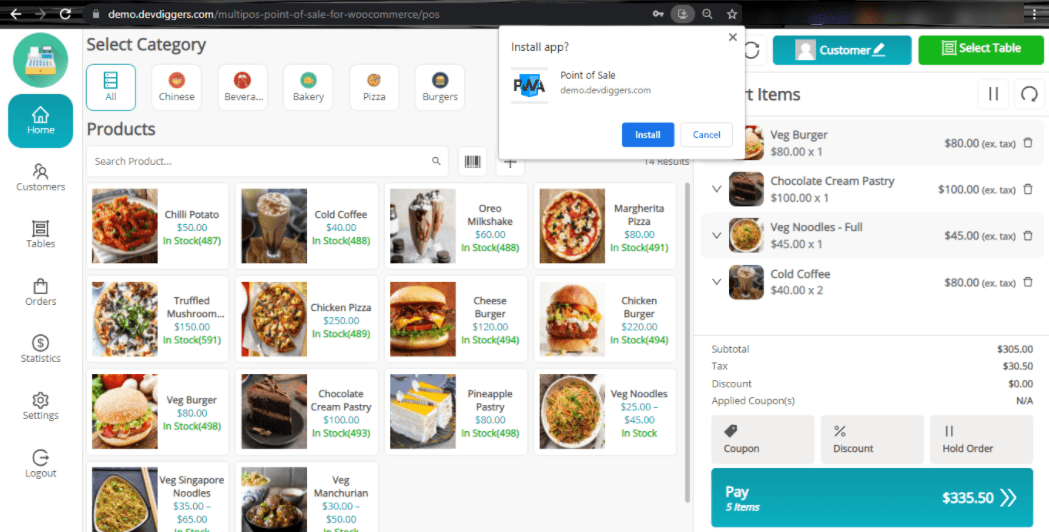
To install, open the POS endpoint in a supported browser (Chrome, Edge, Safari) and look for the install icon in the address bar. Click to install and an app icon appears on the home screen or desktop.
Grocery/Retail Outlet Workflow
Complete workflow for retail/grocery outlets:
- Search or scan products to add to cart
- Select or create customer (optional)
- Apply coupons or discounts if needed
- Choose payment method(s)
- Collect payment and complete order
- Print receipt/invoice
Restaurant/Cafe Outlet Workflow
Complete workflow for restaurant/cafe outlets with table management:
- Select table for customer
- Add products to cart
- Send to Kitchen: Orders appear on kitchen display
- Hold order while customer dines
- When finished, retrieve held order from table
- Process payment as usual
- Print receipt
Customers Menu
Cashiers can manage customers directly from the POS:
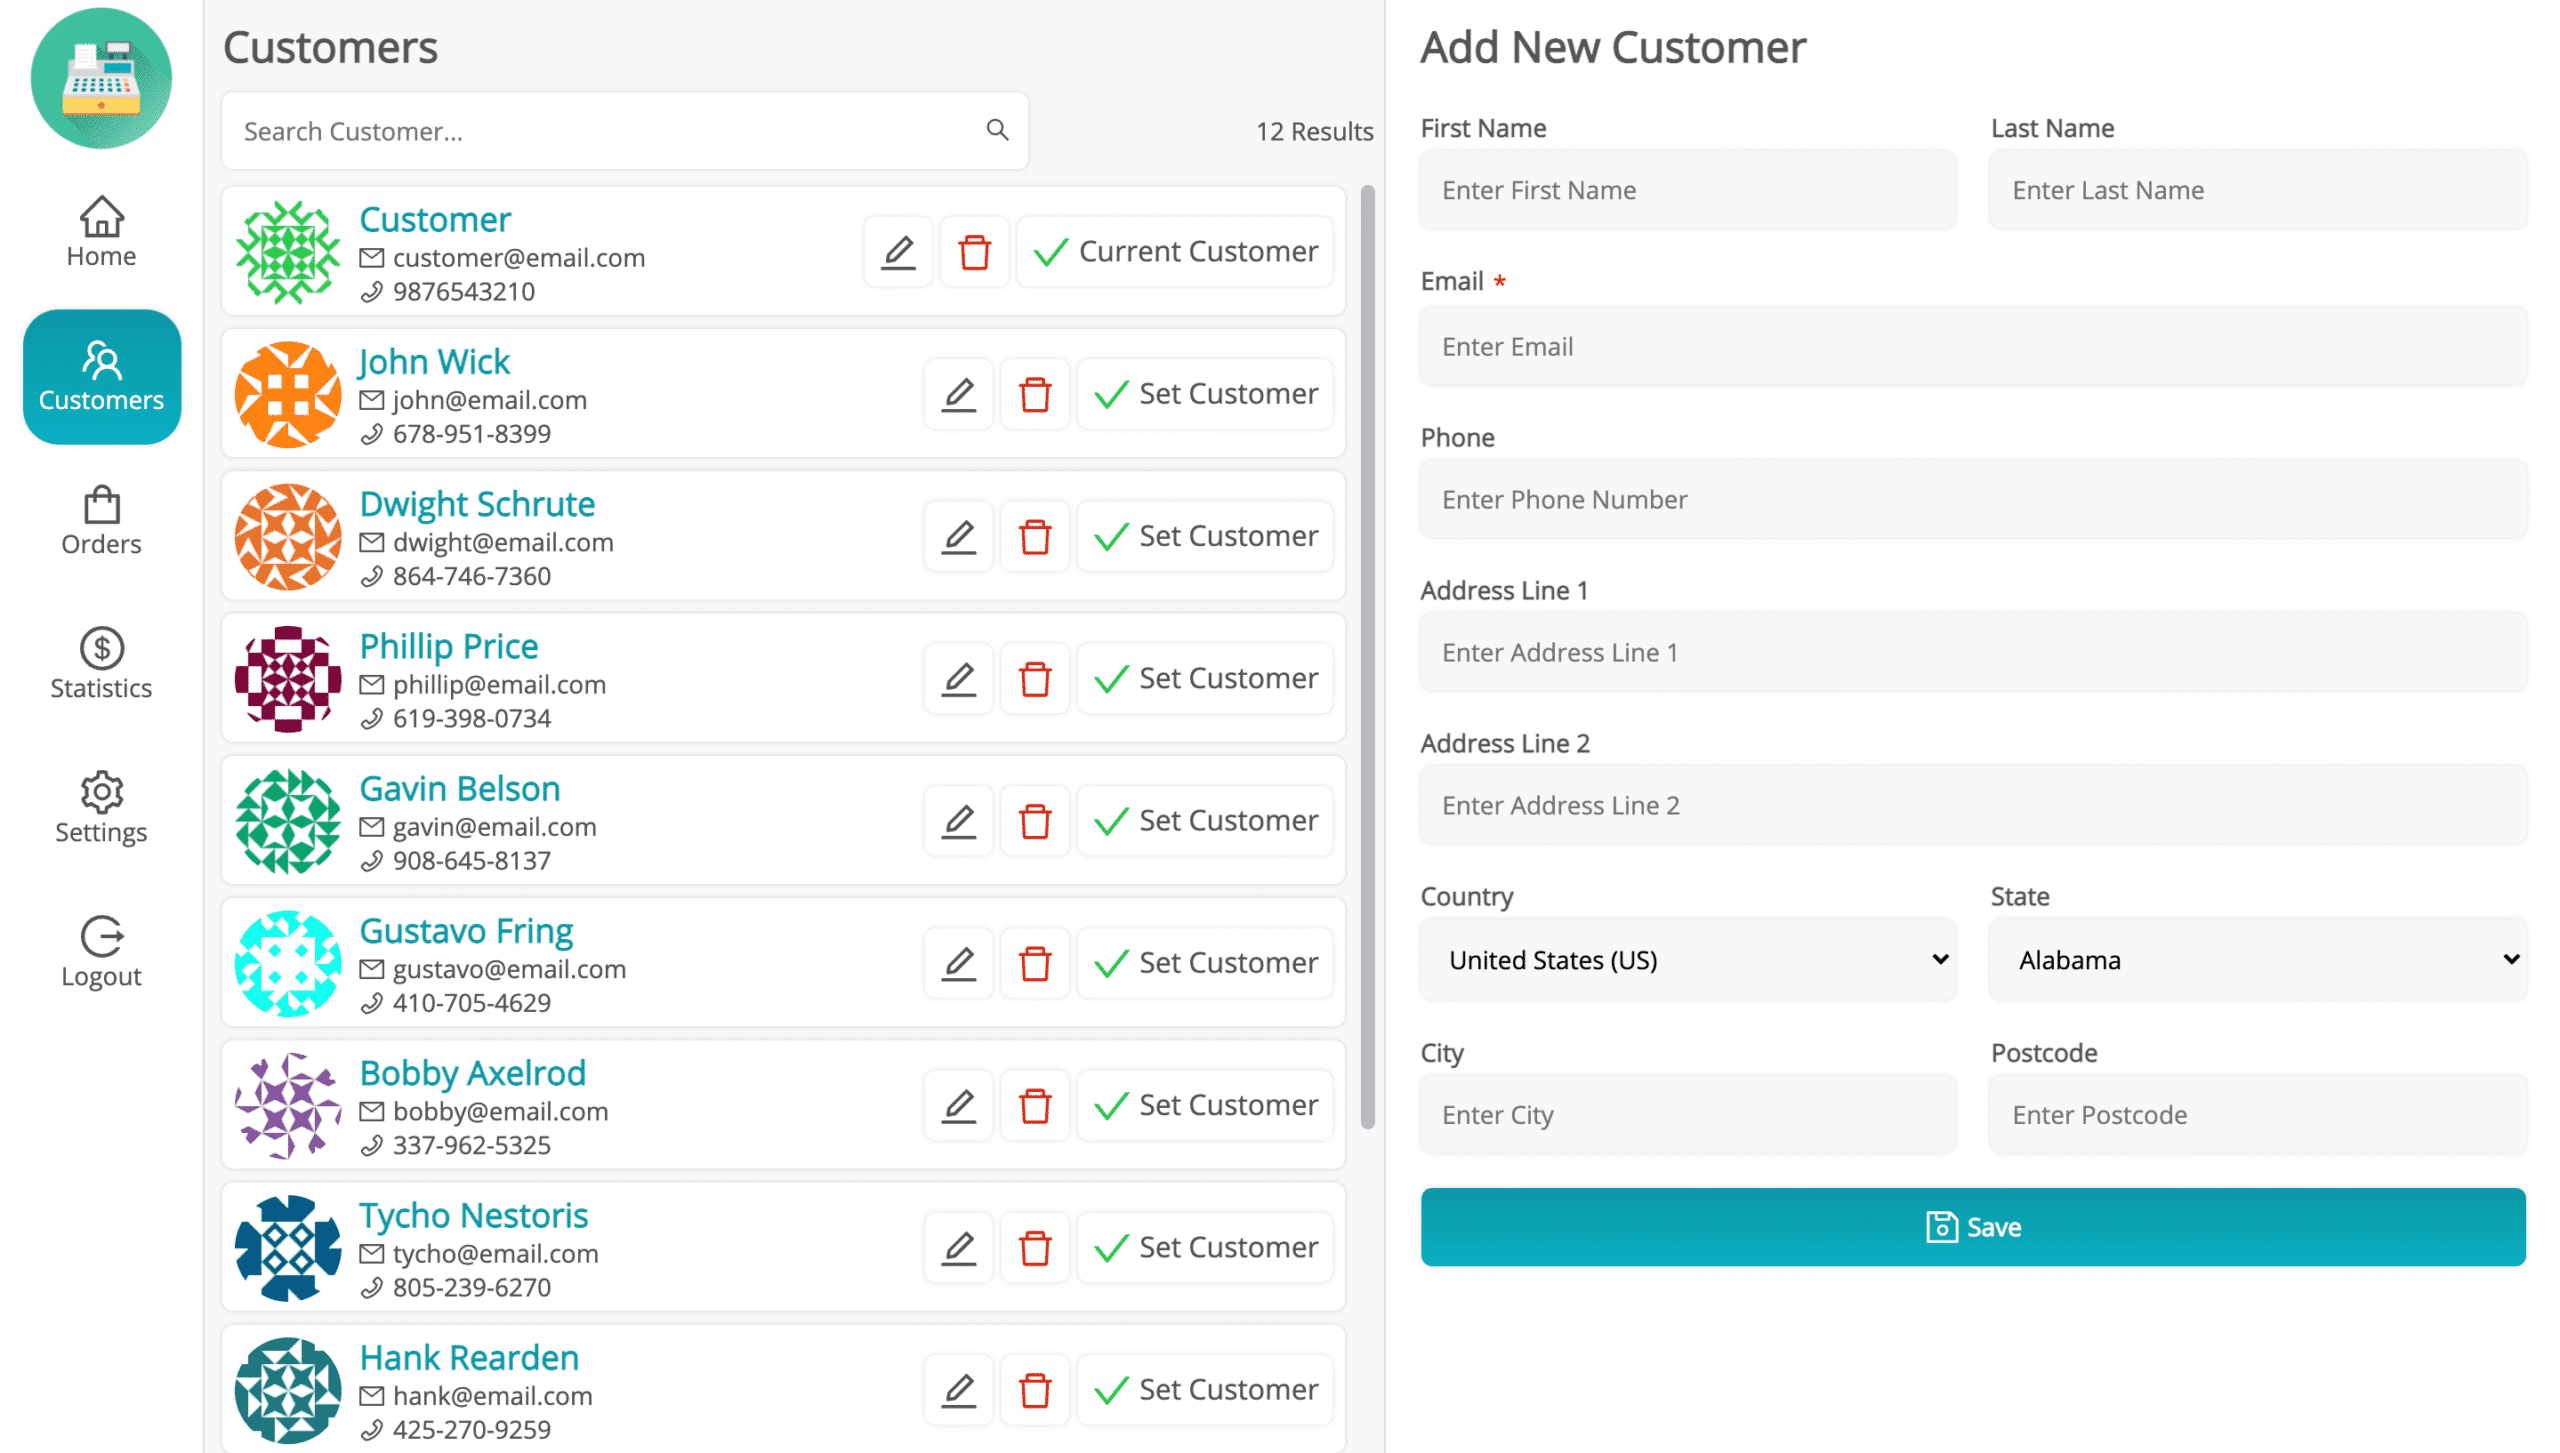
- Search customers by name, email, or phone
- Create new customer accounts
- Select customer to associate with order
- View customer order history
Tables Menu (Only in Restaurant/Cafe Outlets)
For restaurant outlets, cashiers can manage tables and orders:
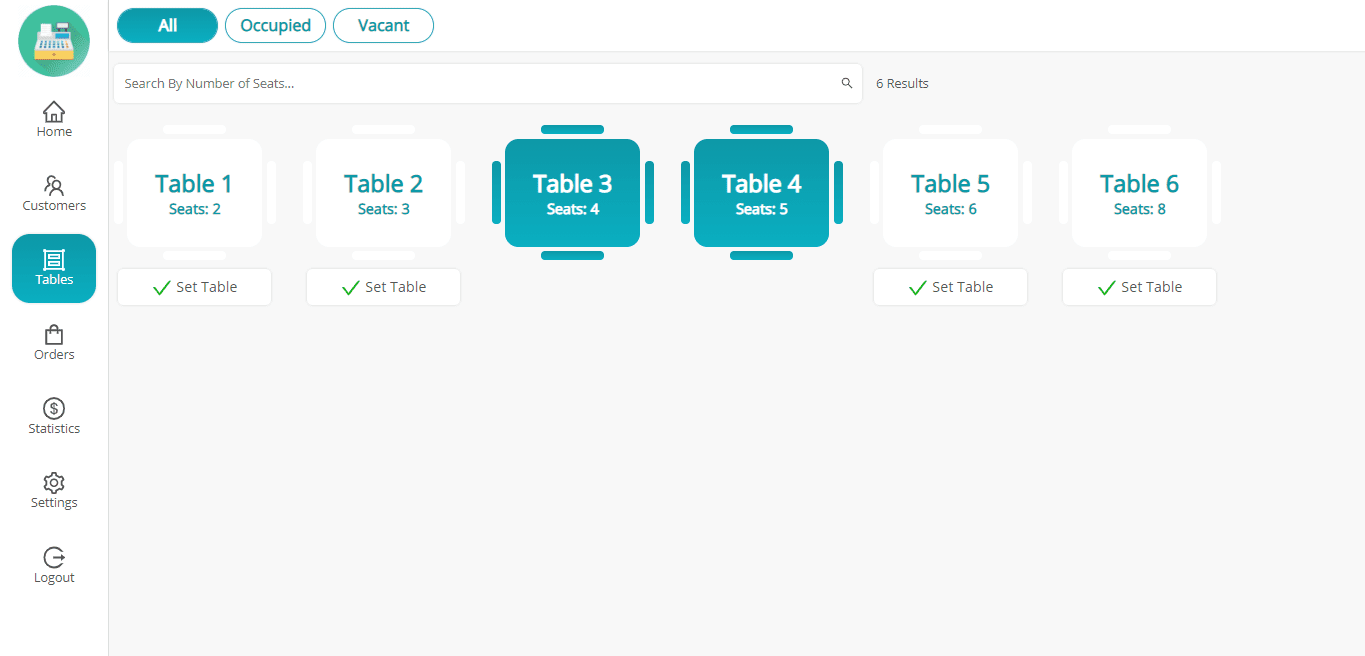
Select an available table, add items to the order, and either send to kitchen or hold for later. When the customer is ready for the bill, retrieve the held order from that table and process payment.
Orders Menu
View and manage all orders (online and offline) from this menu.
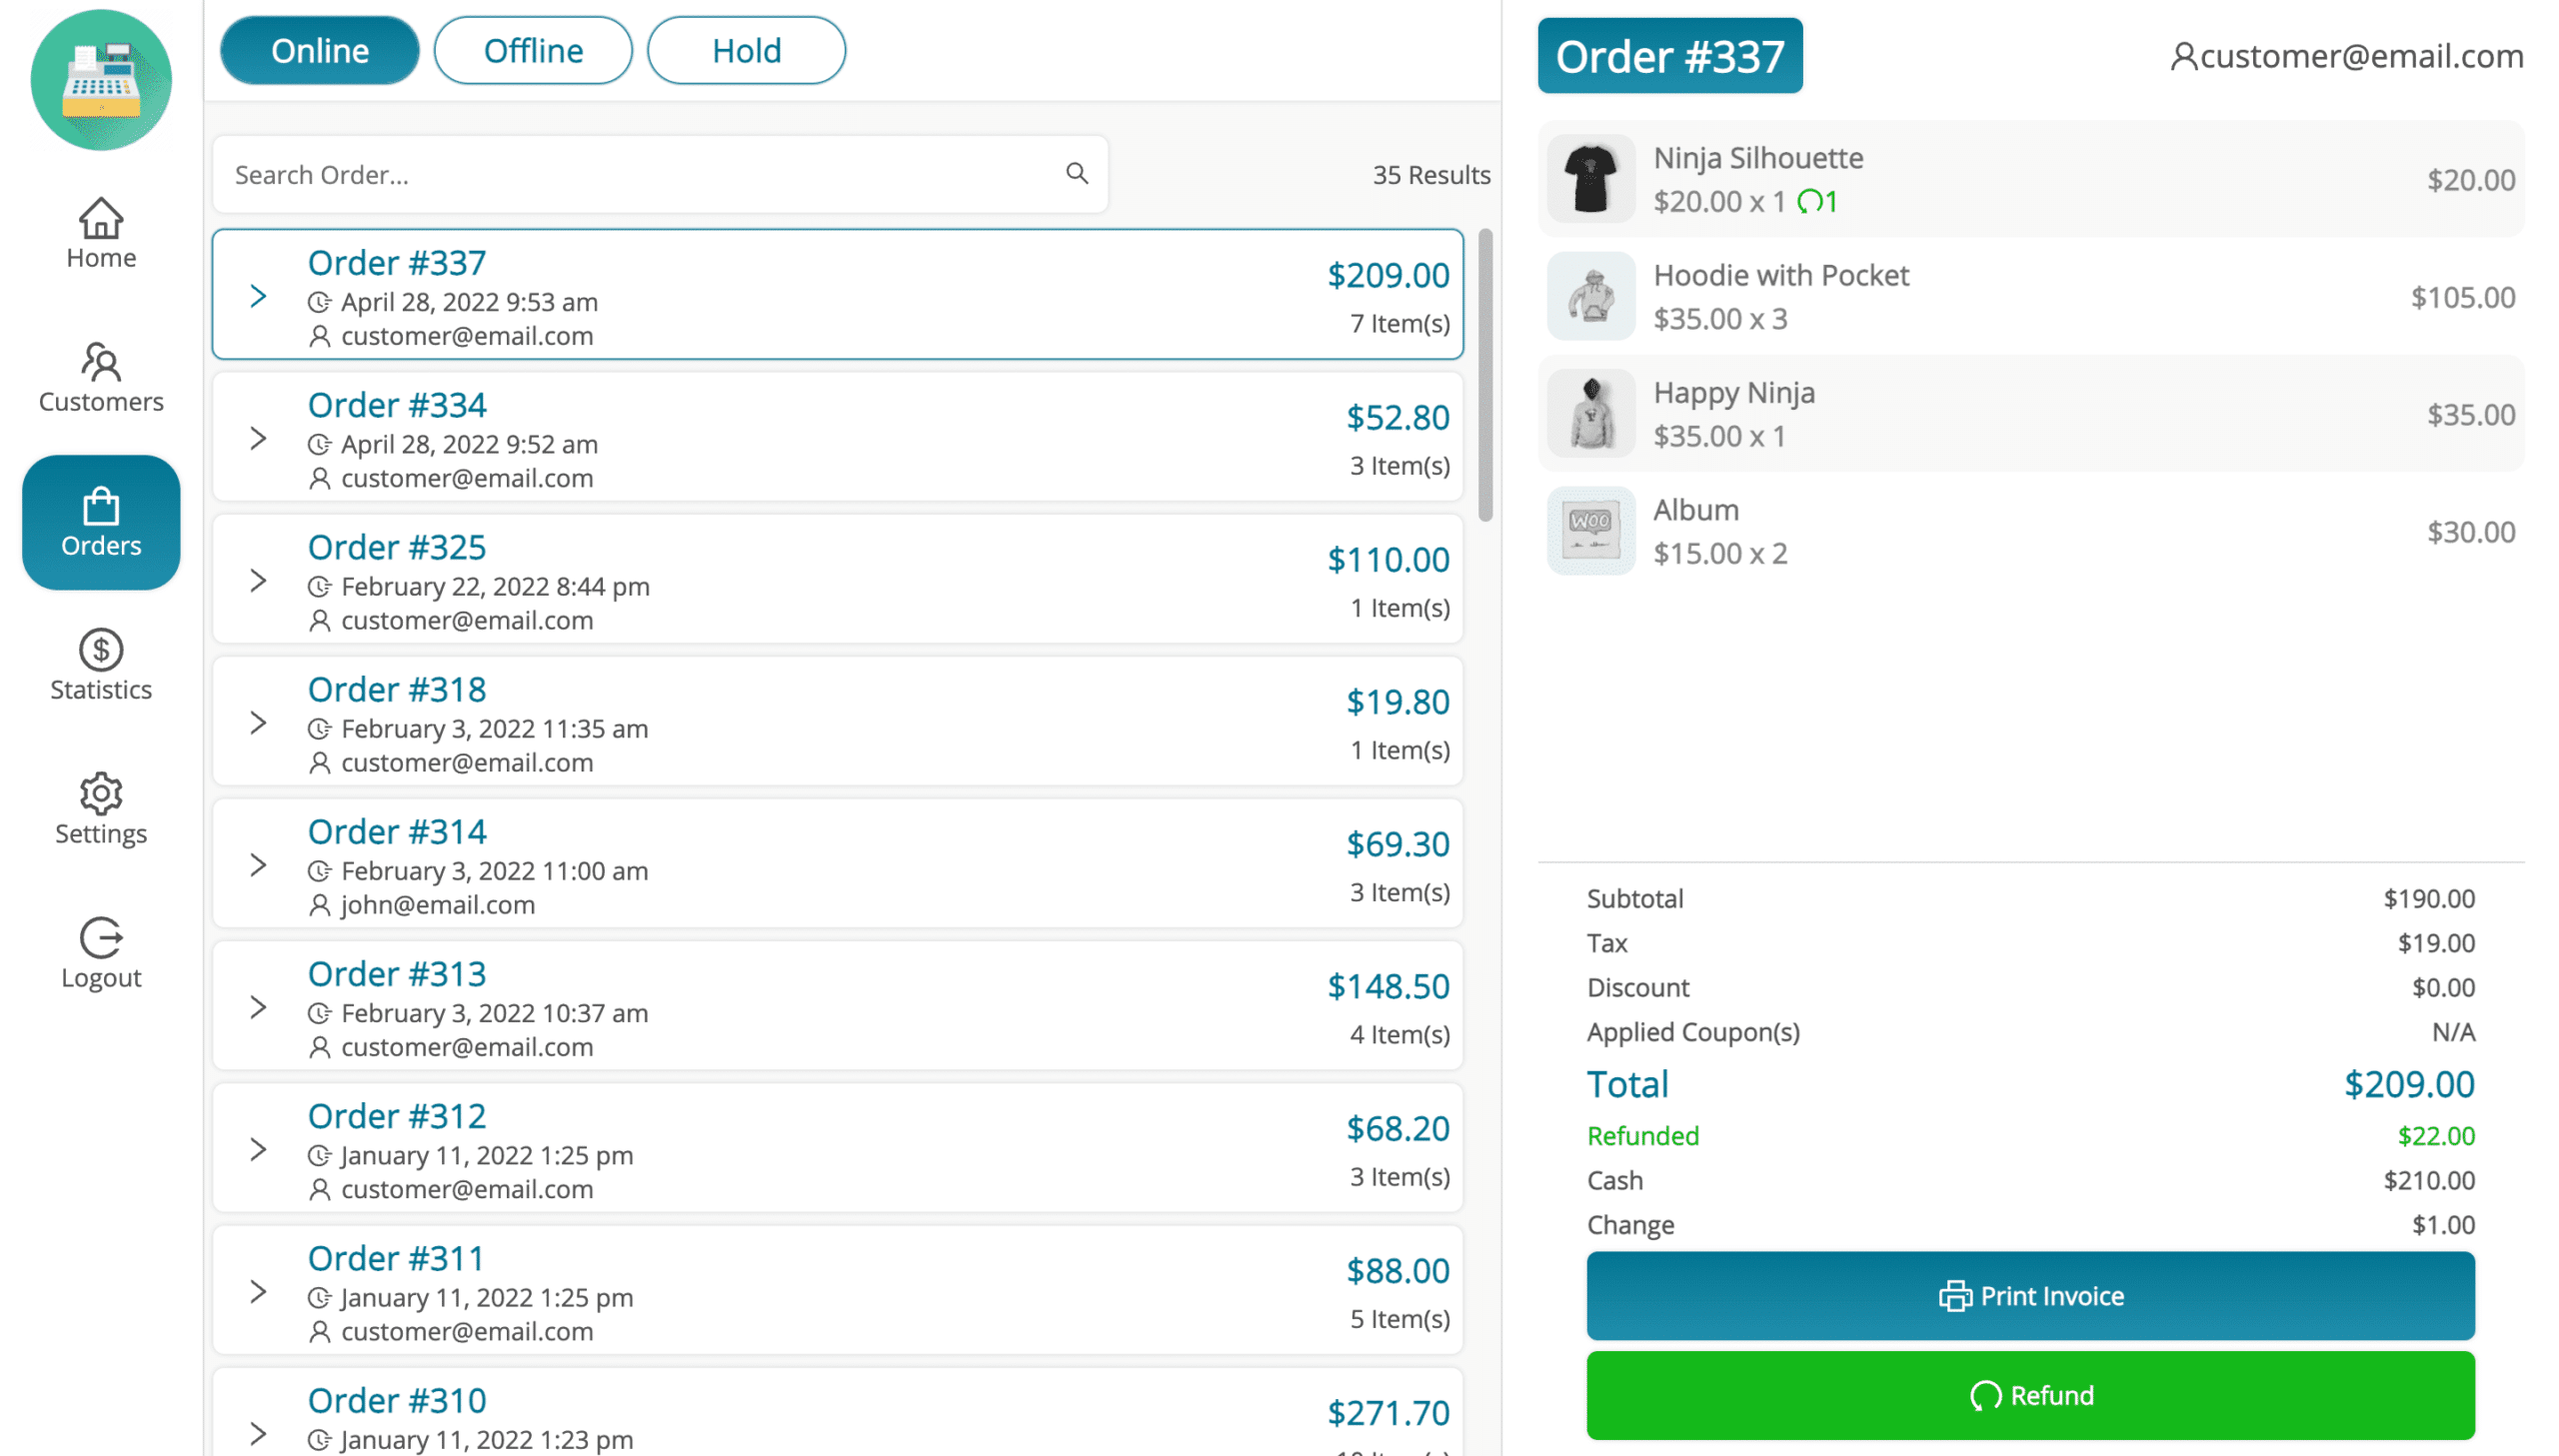
From the Orders menu you can review order details, reprint invoices, process refunds, release held orders back to the cart, and send orders to the kitchen (restaurant mode).
Statistics Menu
View daily sales reports and cash drawer statistics.

The statistics display shows:
- Opening cash drawer amount
- Cash sales total
- Total sales (all payment methods)
- Expected vs actual cash drawer balance
- List of daily transactions
- Option to manually add cash-in/cash-out transactions
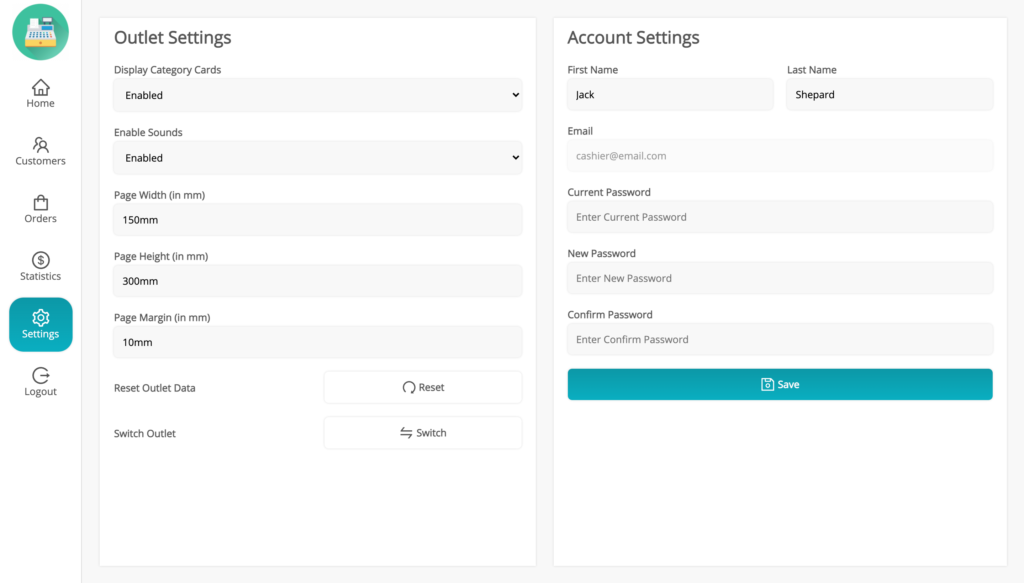
Settings Menu
POS settings include Outlet and Account categories:
- Outlet Settings: Control category card display, enable/disable click sounds, customize printer page
- Reset Outlet Data: Reload fresh data from backend after admin changes
- Switch Outlet: Change working outlet without logging out
- Account Settings: Change name and password
Logout
When logging out, a confirmation popup asks whether to delete browser data. Deleting ensures the next login loads fresh data from the server. Not deleting will keep cached data for faster startup. Manual data refresh is available in Settings if needed.
Adding Product via Barcode
Products can be added to the cart by entering or scanning a barcode.
Adding Custom Product
When the "Enable Adding Custom Product" setting is active, cashiers can add products that aren't in the catalog.
The cashier enters product name, price, and quantity. Works only with WooCommerce exclusive tax settings.
Unit/Weight-Based Pricing
For products sold by weight (produce, meat, etc.), enable this feature to calculate price based on entered weight.
When adding weighted products to cart, a popup asks for weight. The price is calculated automatically using the product's unit price.
Hold Order
Cashiers can temporarily pause orders without completing checkout.

In grocery outlets, hold orders upon customer request. In restaurant/cafe outlets, orders can be put on hold after selecting a table and sent to kitchen. Held orders can be retrieved later from the Orders menu or table view.
Kitchen View (Only in Restaurant/Cafe Outlets)
Restaurant outlets can send orders to a kitchen display system for food preparation.
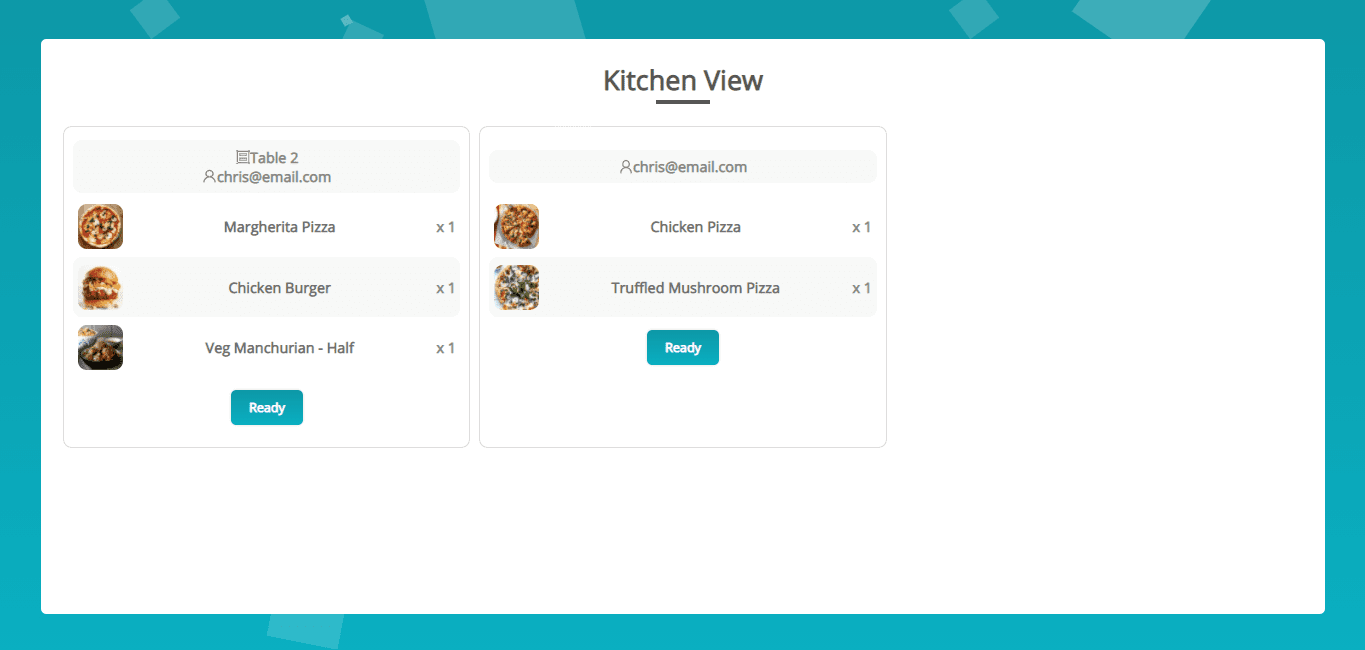
Configure the Kitchen Endpoint in General Settings, then open that URL on a screen or tablet in the kitchen. Orders sent from POS appear in real-time. Kitchen staff click "Ready" when an order is prepared, removing it from the display.
Updating Cart Products
Cashiers can modify product price and quantity directly from the cart:
Tap on a cart item to edit its quantity or price. Changes are reflected immediately in the order total.
Adding Coupons and Discounts
Apply discounts at checkout using WooCommerce coupons or custom cart discounts.

Cashiers can apply fixed amount or percentage discounts directly in the cart, or enter WooCommerce coupon codes. Discounts calculate in real-time. Manager approval can be required based on configuration.
Offline Order
MultiPOS supports offline mode for continued operations during internet outages.
How it works: Load data while online first. Once data is cached, the POS continues working if internet drops. Orders created offline are stored locally and automatically sync when connection is restored.
Important: Offline mode only works when the outlet uses Custom inventory mode. It does not work with Centralized/WooCommerce stock as a security measure to prevent overselling.
Order Refund/Return
Process refunds and returns directly from the POS terminal.
From the Orders menu, select an order and choose items to refund. Optionally restock returned items. Provide a reason for the refund. The refund receipt is generated and the order is updated in WooCommerce.
Pay Screen
The payment screen allows selecting payment methods and completing the transaction.
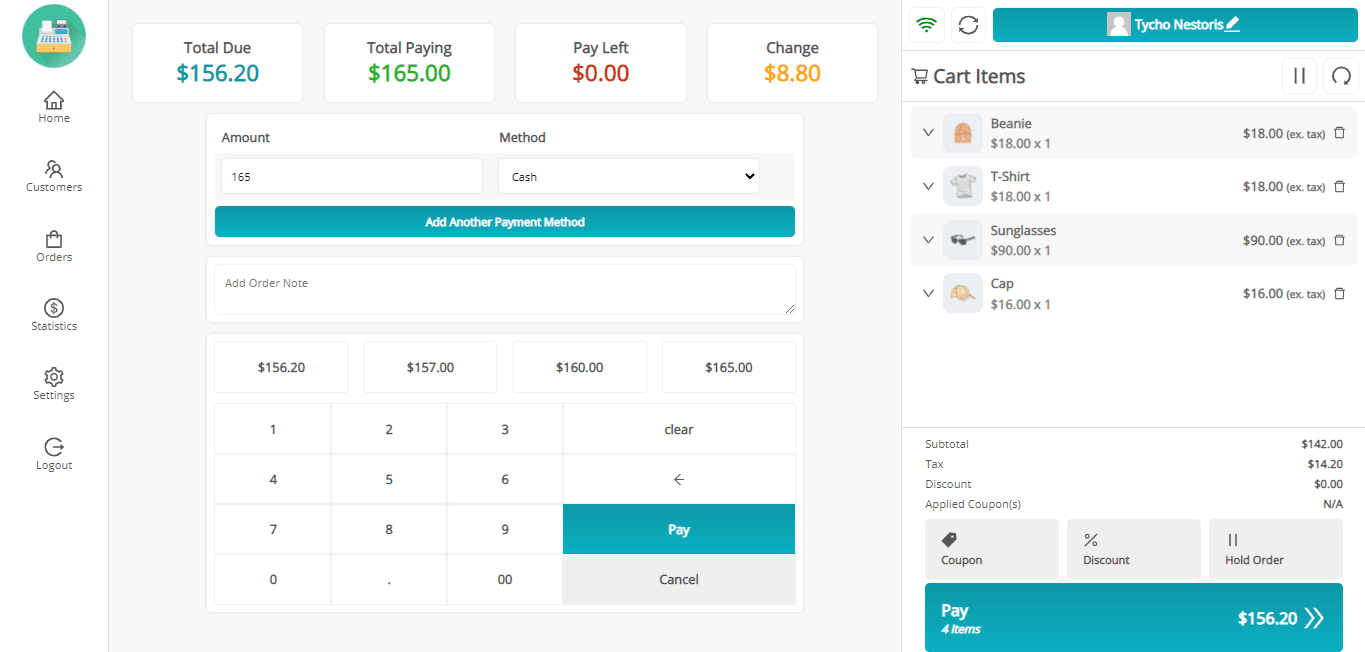
Cashiers can:
- Select one or multiple payment methods (if split payments enabled)
- Enter received amount and calculate change
- Add order notes if the feature is enabled
- Complete the transaction and generate receipt
Sales Receipt/Invoice
After payment, a receipt/invoice is generated and can be printed or saved.
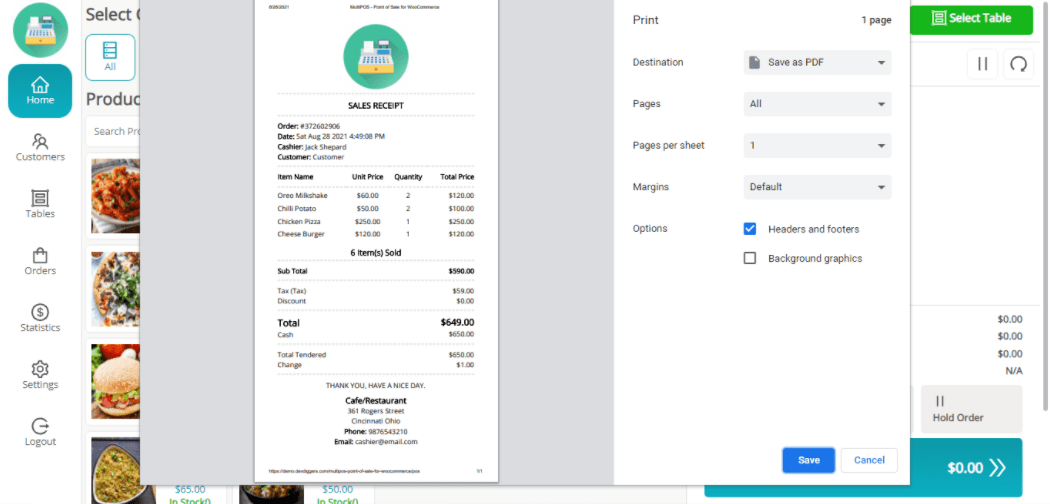
Receipts include business logo (if uploaded), outlet info, order details, items, totals, payment method, date/time, and can be customized in the Printer Configuration. Previous invoices can be reprinted from the Orders menu.
Multilingual
The plugin includes a POT template file (ddwc-multipos.pot) for translations. Use the Loco Translate plugin or Poedit software to create PO and MO files. Place the translated files in the standard WordPress languages/plugins directory.
Support
If you have any concerns, need assistance with our WooCommerce extensions, or want customizations, contact us through our contact page. We will do our best to provide immediate assistance.
Quick Links
Resources
Support
Requirements
- WordPress 6.5+
- WooCommerce 9.0+
- PHP 7.4+
- MySQL 5.7+